My New Blog: TF Workshop

Saturday, March 31, 2007

Kitchen & Hutch - Paint & Details

I installed the granite edging yesterday and will grout it later on this evening. I bought another package of SpectraLock epoxy grout at Lowes last night. This picture shows the granite and the great paint job my DW did on the cabinets (more on paint at the bottom of this post).


I am really happy with the way the french country legs turned out with the beadboard. Notice that the legs don't go to the floor, but to the top of the base trim. We thought that this would look good and be easier to sweep around.

Here is the end of the hutch:

Here is the bottle rack on the island. I had an extra 5 inches available on the backside of the appliance-lift cabinet, and this seemed like a good idea.

Painting

Painting advice: buy good primer, paint, caulk, brushes and additives - and you will get a good job.

My DW bought Sherwin-Williams ProClassic waterborne latex acrylic paint, in semi-gloss. It seems to be really good paint. It flows nice, covers well and does not show brush marks. It is designed for interior cabinets, furnitre, etc.

She did three coats of this on top of the primer coat. Next she will do the the glaze finish.

For the third coat of paint, she added Floetrol paint additive. This makes the paint flow better and extends the drying time. This allows for the very smooth, brush-stroke free finish. By the way, this product is made by Flood, who also makes CFW for exterior wood - everything I have bought from this manufacturer has been very good quality and met my expectations.


Caulking

Once assembled, every joint and interface was caulked with GE latex / silicone caulk. Here is how I get a good caulking job (there have been many times in the past when this was not the case).

  • Lightly sand the surface
  • Wet the surface with a damp cloth
  • Apply a small bead of caulk (cut the tip small) - pushing the tube, not pulling
  • Smooth with my finger - get rid of the excess
  • Run a wet cloth lightly over it
  • Lightly sand again once dry

Thursday, March 29, 2007

Kitchen Island Progress - Sanding and Painting

I have discovered that there are three things that produce a good paint job on wood: priming, sanding, and never mess with drying paint (keep the wet edge). The biggest pain is sanding, but it also produces the best results - and my new toy for it is the Ryobi Corner Cat sander I bought at Home Depot for $30. Here is a picture:


Its a simple little one-speed sander that takes hook & loop pads. I allows me to get into most of the edges and tight places.

I found that I was spending more time and energy worrying about how much sanding I needed to do, rather than just doing it - so now I just do it. Normally, if I am painting, I sand 3 times: raw wood, after primer and after first coat. This seems to give the best results.
- Bare wood needs to be smoothed
- The grain raised by the primer needs to be taken down (water based primer)
- A small amount of grain seems to raise again with the first coat that should be taken down

My plug for Ryobi tools: they work well for home-owner use, don't cost a lot, and seem to be very reliable.

Wednesday, March 28, 2007

Kitchen Island Progress - Part 2

I complete the cabinet assembly: Installing the french country legs, base trim, caulking, sanding. We have part of it painted - hope to finish the base coats tomorrow.
Here is island before the base trim was installed:


Here it is after the base was installed and caulked. Once it's painted, I will install a final shoe molding. Here is a neat tutorial on www.easy2diy.com on how to do it.


I used poplar for the base, since it's pretty tough and takes paint really well. Here is the other end of the island. With the legs installed. The space at the floor is for the kickplate drawer


The next two pictures are of the hutch, which is the same design as the island. Tomorrow we will install the legs, base trim, crown molding, and get a couple of coats of paint on it.
The upper center cabinet will get dowel racks to hold plates.


Monday, March 26, 2007

Island Design - Traffic & Work Triangle

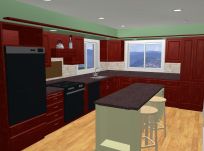
Here is a diagram of our kitchen island with the clearance dimensions (click on the picture for a larger view).


Our kitchen has enough floor space - 180 square feet, plus a good sized pantry & laundry right off of it - but it would have been great if it were 1 ft wider. Since it's 11 feet wide, we had to really think about how wide we wanted with island, and still allow for good traffic flow. There are two things that really helped us decide: The NKBA guidelines and mocking up the island to see if it would work.

On the oven side (the working side) of the island, we went with 42 inches. This allows for two people to pass easily if the oven or dishwasher doors are closed, and one to pass if they are open.

On the opposite side of the island, we went with the minium of 36 inches. We have seating for two on this side. When people are seated, you can walk behind them - you have about 24 inches clearance when someone is seated there. Six more inches would have been great, but this was the point of compromise.

This allowed us a 30 inch wide island. Again, if we could have 6 more inches on the island, it would be great - but 30 is workable. If I design a kitchen layout in the future, I will allow 12 feet minimum for the width...

As far as the work triangle goes, we were not able to follow all the design guidelines exactly. The fridge is a bit "out of the way" compared to their recommendations, bu it works fine. We get what we need out of it and set it on the island.

The total triangle should be 26 feet and ours is 29. No leg should be over 9 feet, and we have one that is 12. The distance from the sink to the fridge is the one that gets us. So far, it seems to be OK.

Here is a summary of the kitchen design guidelines for minimum clearances and traffic flow from NKBA.Org

  • Doorways should be at least 32 inches wide and not more than 24 inches deep. When two counters flank a doorway entry, the minimum 32-inch-wide clearance should be allowed from the point of one counter to the closest point of the counter on the opposite side.
    Walkways should be 36 inches wide.

  • Work aisles should be at least 42 inches wide in one-cook kitchens, at least 48 inches wide in multiple-cook kitchens.

  • The work triangle should be no more than 26 feet, with no single leg of the work triangle shorter than 4 feet nor longer than 9 feet.

  • If two or more people cook at the same time, a work triangle should be placed for each cook. One leg of the primary and secondary triangles may be shared, but the two should not cross one another.

  • No major traffic patterns should cross through the work triangle.

  • No entry, appliance, or cabinet doors should interfere with another. In a seating area, 36 inches of clearance should be allowed from the counter or table edge to any wall or obstruction behind it if no traffic will pass behind a seated diner. If there is a walkway behind the seating area, 65 inches of clearance, total, including the walkway, should be allowed between the seating area and any wall or obstruction.

Saturday, March 24, 2007

Beadboard Cost: $112

It took seven packages of beadboard to for the island and the hutch (still to be completed) at $16 each. We did not do a whole lot of searching for this - just went to HD and bought it. Each package is about 12 1/2 square feet.


He went with rustic pine - here is a picture:


Panelling would have been about 1/3 less cost and a bit less work, but would not have the feel we were looking for.

They also sold an MDF version that would have been pre-primed and easier to paint, but we have a NO MDF policy for the kitchen cabinets. MDF would be fine for the cabinets boxes, but not for the exteriors. If the it gets damaged, it does not look aged, it looks rotten. Pine beadboard can take a dent and look all the better for it. MDF will look fuzzy and cheap.

My DW, the painting guru, is taking it from here. Primer, 2 to 3 coats of base paint, a coat of antique glaze (darker color), and 1 to 2 coats of polycrylic on the heavy wear surfaces.

A tip for sanding:

  • You should always sand after the primer coat if you use water-based primer. It raises the soft part of the grain. You need to get this smoothed down for good resutls
  • A lot of people I talk to don't like the idea of sanding. My only advice is to learn to love it (not the sanding, but the results).
  • You can quickly do the surface with an orbital sander, palm sander or even a sanding block. Use 120 grit paper. Don't over-do it.
  • For beadboard, use a fine grit drywall sanding sponges with the sharp angle side. It easily gets into the beads. If you want the sponge to last, wrap a sheet of sandpaper around it, and use it that way.


Friday, March 23, 2007

Getting some air time

I added a new blog-hit stats counter: Histats.com - lot of cool reports, etc. It's free, and easy to apply to your site.

I was reviewing the "referred by" report, and found that my blog has appeared in a few online magazines - a couple of them doing a short write-up. I realize that it's not that big of a deal, but I got excited about it.
Here is the list

At the end of the day, I have been blogging this kitchen to share info with people. I get a lot of personal satisfaction in helping people out, sharing ideas, etc. Also, I have always wanted to write, but never saw myself as having the skills - and this is a good way to practice.

Thursday, March 22, 2007

Bar Stools: $80

We bought two of these stools for the bar at Linens and Things for $40 apiece. We selected the ones with the black finish, to match all the other black items in the kitchen.


These are very comfortable for being wood seats, and we like the style.

Electrical Bits: $100

The island electrical parts cost about $40. The other electrical parts for the kitchen were around $50 - so I am calling the total for the bits $100. If I did not have a store of parts, wire, etc. I would have spent more like $200 to get everything.

For electrical parts, I will take Lowes over HD any day of the week. More organized, better selection, especially decorative stuff - at least here in Oregon.

Granite Top on the Island and Hutch

I installed the granite tops on the island and hutch. The poly glue worked so good last time, I did it again.


I scratched one of the large tiles with wet granite residue on the saw. I also ended up being one short, so I had to go get two more. $125 later, the tops were installed. Lesson learned: wipe of the bottom of the saw after each cut.


FYI: The blue tape is to cover the joints and keep them clean until I grout. I will cut and install the front pieces in the next few days


Updating cost:

  • Granite tiles: $1640
  • Total: $10,260

Monday, March 19, 2007

Remodeling Tradition: Graffiti

We want to be the kind of family that has lots of traditions. Some of them are planned, and others just kind of pop into being. Having the kids put graffiti on remodeling projects while they are in progress is one of the "others". I don't ask the kids to write on stuff, they just come up and start doing it. My daughter started this about 10 or 12 years ago, and the others have followed suit.

The counter top here is waiting for the large pieces of granite. I would have had it installed already, but I came up a piece short. So its going to be a couple of days...


Saturday, March 17, 2007

The Design Process between DW & DH

Someone posted a pretty insightful question yesterday: How does the design process work between you and your DW? There is no doubt there are many variations on this - here is our general approach...

I act as the overall designer. My DW focuses on function, details and color. I am an efficiency nut (engineering background). She is really in-tune with the people aspects. So, all in all, we make a good team. Also, we have been at this together for 20 years - I think it took our whole first house to figure out how we could work together and enjoy it.

Here are some thoughts on how we designed our kitchen island...

Getting a common theme: We went to the PDX Street of Dreams, among other places, and found a kitchen that has the look we wanted. It was an informal, cottage, south euro-country feel. My DW picked out colors to go with it.

I started with an island design that was totally utilitarian - maximize the storage, pull out shelves - basically a big, organized box. I found the specifications for how large the island could be and still give good circulation. My DW really wanted people to be able to sit at the island and talk in the kitchen. She also wanted to have the counter-top appliances stored there.

Here is where the design process really begins. I will make some drawings (MS Visio and BHG Home Designer 6) and we will talk over those. Usually, we end up changing these about 3 to 5 times. Example: my first drawings had seats at each end of the island, but this didn't allow for a display shelf, and we could only fit two cabinets in, not three. So after some thinking, we decided we could loose some cabinet depth on two of them, and move the seats to the side. This also worked better with circulation, since there is a wall on that side.

One of the most important things I have learned, you can't shortcut the discussion process - it lead's to misunderstanding and trouble. I like to push ahead, my DW prefers to think things over. So I push ahead with a set of drawings, and she thinks about what she wants - I used to head right to the tablesaw and start cutting wood (not a good idea). I can see it in my head, she needs pictures. I think of how a project is going to fit into the scheme of the house, she wants to know how many knives will fit into the top drawers - both things are important.

Friday, March 16, 2007

Kitchen Island - Installation in Progress

Well, I spent the last month on the tablesaw and not on the keyboard. I had good intentions to take tons of photos and post every step - didn't happen.

The island has turned out great so far. I finshed building the cabinet boxes and main base. I set them in place and applied beadboard to the exposed surfaces. My DW primed everything while I was out of town and started to apply the base green color.


The dining room end of the island shown here has display / book shelves.

We spent quite a while playing with inches to get the maximum cabinets space, and also allow for seating. We can comfortably fit two stools in the 50" wide opening.

The other end cabinet is 23 inches deep for an appliance lift (see below). This gave us just enough space - 4.5 inches - to add a bottle rack to the back. It will fit wine bottle, but since we don't drink much, we'll have flavored syrup bottles displayed.

We put quite a number of outlets into the island. Since the wire is surface mounted, code requires it to be shielded by conduit. This flexible plastic option worked well. The cabinet with the lift and the center cabinet will have small appliances in them all the time. The in-cabinet outlets will keep the cords in order.

Here is the appliance lift harware. I need to build the shelf this weekend.


[Link to photo set]