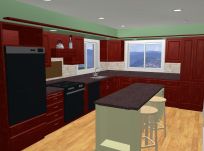
Here are a couple of pictures of the pot rack and pendant lights installed. Below I detial out the steps on how to easily align these to the island.

Observe that the dog is just as interested in the new rack as I am...

How to hang a pot rack
Getting the lights and pot rack lined up to the island is not hard, it just takes a little bit of time. Here is what you need:
- Plumb-bob (Wikipedia article on using this)
- String (Mason's line is the best)
- Ruler
- Small Square
- A few nails and hammer
- Painter's tape
- I set the rack and lights on island, in the positions I wanted them to be on the ceiling.
- Take time with this step. Make sure you have everything where you want it, and that everythnig is centered.
- Have a someone else (my DW) look at it and verify its correct - saving lots of pain later on.
- The two pendant lights make the "long axis" of the layout.
- I put tape on the island and marked the center of the lights.
- I used a plumb-bob to transfer the marks to the ceiling.
- I checked the marks against the closest side wall, just to make sure things were OK. They were within 1/8" inch of each other, so there was no problem. I think anything 1/4" or less is not even worth adjusting for.
- I drove a nail at the two points I marked on the ceiling, and stretched a string tightly between them. This is the key step - since the string on the ceiling is a main line for the pot rack.
- Once I figured out where I wanted the chains to go, I marked the positions on the ceiling along the line.
- Using a square, I marked the positions from the line where the pot-rack bolts actually go.
- The diagram gives the general idea:

- One the marks were in place, I checked everything against the side wall to verify.
- Note that I have put the pot rack chains going slightly outward in both directions. This helps stabilize it, and reduce the "swing set" effect. Once a few pans were put on it, it hardly moves at all.
Mounting the rack:
- None of the places I wanted to put bolts had trusses.
- Using toggle-bolts, etc. hoping that the ceiling sheetrock would be strong enough for the pot rack is nuts. Even if it did work today, it would come down at some point.
- I drove nails through the ceiling where the bolts when, and when up in the attic and put some blocking in place. Pulling out insualtion and putting this in is a pit of a pain, but don't skip it.
- Here is a fairly good article from Lowes on adding blocking for a rack: http://www.lowes.com/lowes/lkn?action=howTo&p=Build/hngpotrck.html
Adjusting the height:
- I left the extra chain on for now. We are gonig to use the rack for a week to make sure it's at the right height, then cut the excess chain off.
More detail in my article library on eHow...