My New Blog: TF Workshop

Showing posts with label Soffit. Show all posts

Monday, January 28, 2008

Review #14 - Soffit Above the Kitchen Cabinets

This is somewhat of a controversial topic: Should you tear out the soffit in an older kitchen or leave it in? We left ours in and actually added to it for the additional cabinets. We added a display shelf to it, as shown in the picture:


Are we happy with the choice? Yes. The main reason is the display shelf idea we came up with. If it were just a plain soffit, I would have rather had cabinets that went all the way to the 8 foot ceiling. Here is a picture of it before shelf - not too exciting...


We did not have the problem that many people do: The soffit holds a large amount or electrical wiring or plumbing. Ours is basically hollow, so we were not "forced" to keep it in. It would have been straight forward to tear it out and patch the ceiling, but we wanted to keep it in the design.

Here is a picture of the section I added to go over the double-oven and bookshelf cabinet...


Why we like it:
- We don't think it looks dated in our kitchen with the added shelf. The shelf helps bring the edges of ceiling down, improving the feeling of scale.
- The shelf displays things much better than setting thme on top of the cabinets
- We don't have the "dust on top of the cabinets" problem

Sunday, July 29, 2007

Building and Installing the Soffit Shelf

I fabricated the shelf that goes around the kitchen soffit. I glued and air-nailed 1/8 cherry plywood to a center core of 1/2 maple plywood. I left the center set back as shown to allow of it to mount to the strips I attached to the soffit.


Here are a couple of pictures of the strips. These are poly glued and air-nailed with 1.5 inch nails. I used a little marking fixture to mark the bottom of the strips all the way around before trying to mount them.


When I mounted the shelves on the strips (tapped it in place with a mallet), I had the unexpected result of having them stay up on their own. Once I put the 45 degree corner peice in place, it became very solid.

I had to basically build the corner piece in place, buy marking, cutting, then hand planing the pieces to fit. If everything were perfect, the piece would have 22.5 degree sides. In this case, they ended up being 21 on one site and 24.5 on the other. It takes a little while to get a good fit, but having tight joints is worth it.

Here are the shelves installed - I still need to put the front trim strip on, which will be dadoed to help provide good support, and allow me to blind nail it.

I have some cast iron 90 degree brackes I will put on top the shelves to reinforce them, and add some decoration.

Here is a picture of the kitchen - getting close to complete.


Monday, November 20, 2006

Wall work

We are spending Monday and Tuesday doing all the "wall work": modifying the soffits, resizing the window openings and adding can lights.

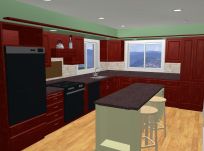
We decided to keep the soffits and put a display shelf along them. Since the upper and full height cabinets are a couple of inches deeper than standard, we needed to extend them. Also we have the new double-oven cabinet, so that soffit was added (left side of picture).

The pictures below show the progression of this afternoon's work: framing, sheetrocking, and taping. I will tear out the (and throw away) the uppers tomorrow.