My New Blog: TF Workshop

Showing posts with label Accessories. Show all posts

Thursday, January 17, 2008

Review #13 - Extra Deep Upper Cabinets

Our upper cabinets are an extra two inches deep (14") to allow for the normal 12" deep shelves, plus room for spice racks on the insides of the doors. While we generally like this design, there are some changes we would make if we did it again.


With the 12" shelves, we were able to put in lazy-susans, giving easy access to a lot more items. I needed to modify 14" shelves by cutting them back as shown.

This extra depth doesn't block any view of the back of the counter top or backsplash.


If I had it to do over again, I would have made the cabinets 15" to 16" deep. I could have put larger racks on the doors, giving a more space. I don't think this would be too deep to allow us to see to the back of the counter top.

Also, for the spice cabinet, my DW says she would have preferred a couple of pull-out spice racks, instead of the door racks and lazy-susans. At some point, I may go ahead and build these.


Friday, April 20, 2007

Island Pot Rack and Pendant Lights

I decided to change plans a bit and work on the pot rack and ceiling lighting instead of cabinets. We have a full Saturday and the weather is going to be cool, so I will be mounting the pot rack, pendant lights and can lights - lots of attic work. Its going to be relatively messy, so I want to get it all done in one shot. This is the last "big mess" thing we need to do.

Here is the assembled pot rack. Its made by Calphalon (link to orginal post). We bought the largest one they sell: 54" x 20".


When I laid out the rack with the pendant lights on the island, they were a bit too close to each other.


The nice thing about this pot rack is that its somewhat adjustable. I took the center pieces out to cut the length by 12 inches - now its 44" long. I could have also taken the rounded ends off to get 36 inches. Considering the rack cost $100, I can take the peices out and still pay signficantly less than the smaller version would be retail. I am going to use the 12 inch sections I removed for small hook bars on either side of the cooktop.

A tip on assembly: put in all the screws finger tight, then use a wrench to tighten them all down. They are much easier to align if you do it this way.

Now the spacing is much better. We want as big of a rack as possible, but not have pans bump into the lights.


I did a bit of research on how high the lights and rack should be. There is of course the common sense approach, but I like to get an idea of what the designers say to do. Unfortunately, as in many cases, there is not a clear set of guidelines that I could find online. It seems like 90% or are just add sites with some sort of fluff paragraph about lighting.

Here is what I found:

  • Pendants should be 30" to 40" inches above the counter top
  • You should be able to see through the island to a person you are talking to. We are a family that ranges from 5'2" to 5'10", so we are going with 30".
  • Same for the pots hanging from the rack. A 20" long pan (includes handle) should be about 30 inches off the counter, but still reachable by the shortest person using the kitchen.
  • The compromise we cam to is to have the bottom of the rack hooks 14 inches from the ceiling. We will set it up with a bit longer chain, and check it tomorrow.

The pot rack is going to need to carry a lot of weight, so I will be putting some blocking in the attic to support the eye bolts for hanging it. I will take pictures of how I do it and post them.

[Link to photo set]


More detail in my article library on eHow...

Thursday, March 22, 2007

Bar Stools: $80

We bought two of these stools for the bar at Linens and Things for $40 apiece. We selected the ones with the black finish, to match all the other black items in the kitchen.


These are very comfortable for being wood seats, and we like the style.

Sunday, December 10, 2006

Trouble with pull-out garbage can

We bought a pull out garbage can from The Container Store - and its about an inch too tall!

I had to move the garbage disposal to the deeper sink, and try to mount the can on the shallow side. Once I started measuring the space against available products, I realized that I would have to do this no matter what.

I made the drain pipe take an immediate out of the sink strainer and moved the trap to the back, and I still have about 1/2 an inch to go. Next I am going to take the metal assembly apart - I figure I can get about 5/8 of an inch by re-drilling the holes, etc. If all else fails, I will cut a little bit off the back of the plastic lip, which I really don't want to do. I am glad that most of the things we are doing don't take this much fiddling... The cost was $49.

In addition to this, we also bought an under-sink wire slide-out organizer for $59.

Total cost $108.

Tuesday, October 10, 2006

Range Hood Module

Since I am building the range hood to match the cabinets, all we need to buy is the fan unit. I selected a Broan Power Module PM250, from NutoneSales.com (Nutone is a brand of Broan) for $90 + 12 for shipping.

The next best price I could find online was $130, and in-store for about $150.

It is a basic unit with 250 CFM, aluminum filters and a light. I read a TOH article on hoods, and they indicated that 250 should be fine for most applications, and if you get above 350 CFM, you can get other back-draft issues.

You can buy a mounting kit, but I decided to pass on it. The hood cabinet is custom anyway, so cutting the hole in the bottom to fit should not be a problem.

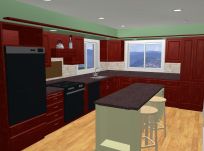
Here is a rendered image of how the hood cabinet will look: