My New Blog: TF Workshop

Saturday, December 01, 2007

Review #9 - Pull-out Garbage Can

We love the pullout garbage can - this is a "must do". Also the pullout rack shown below is really nice. That being said, I would have done very this differently. It was a hassle to install.


The main problem was the garbage can was a few inches too tall. I looked at a number of products, and this was the shortest one I could find, (maybe I should design and market one that would fit better...)

To get this to work:

I needed to move the garbage disposal to the lower sink, so I would have the max vertical distance under the higher one. Having the disposal in the larger sink actually works really well, so no problem there.

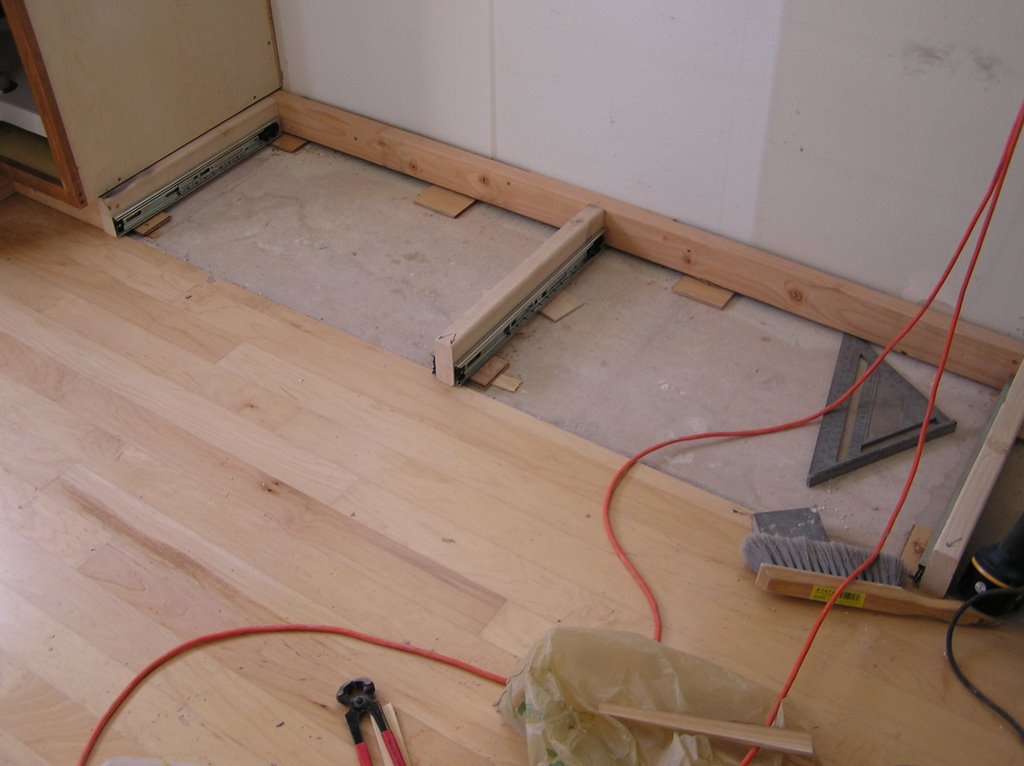
Then I had to create a low-profile drain pipe connection (took three tries), and route it to the back of the cabinet. This gave me space for the garbage can.


After getting the space squared away, the garbage can was still an inch too tall. I took the slide assembly apart, re-drilled some holes, ground down the brackets and took a half an inch out of the height. Half an inch to go...

To get the final bit I needed, I cut the back of the garbage can out so it would slide by the drain pipe. I cut just enough out, using an angle grinder, so the top of the can wouldn't become flimsy.

So after getting my Ph.D. in pullout garbage cans, here is what I would do different: Simply, I would have designed the cabinet so that it would have gone all the way to the floor, and not had a kick-plate area. That would have given me an extra four inches, and it would have been much easier. To make the cabinet look good, you could mount a fake kick-plate the the back of the cabinet door.

One really nice feature that I didn't plan for, is the dishwasher, sink and garbage layout. We can have the dishwasher open, the garbage can out, and the sink with the disposal in the center. This is about the most efficient setup I can think of.

Sunday, November 25, 2007

Review #8 - Work Triangle / Island Layout

I am going to rate the overall layout and work-flow of our kitchen as a 4 (good choice, slight room for improvement). I did a review of it once it was in, but we have now lived with it for an additional 7 months. Here is the layout...


We now think the location of the fridge is great - not just good, even though it fall outside of what is considered an optimum work-triangle. Here is why:
  • The kids can get to it without interfering with people cooking
  • We easily set stuff on the island
  • You can sit at the island, watch TV and grab the milk without moving!
The space between te island and the fridge wall is OK. 36" has not been a problem at all. We can still sit at the island and have someone move behind us. Would 6 inches be better? Yes - but it's not a killer

42 inches between the island and the counter is great. I would not change this, even if I had the room to do so. The max I would want is 48 - any wider and it would not be easy to reach from one side to the other.

Island at 30" x 90" is great. It could be 36" wide, but no wider - too hard to reach across. The kids are able to sit and do homework at the island while my DW is working with no problems. Anything longer than 90" would make the trip around the island too long.

So if I design a new kitchen, it will be 12" wide - 24" for the counter, 42" isle, 36" island, 42" isle.

The pot rack over the island works really well. It provides a lot of storage, does not block cross-views, and looks nice.


More how-to detail in my article library on eHow...

Tuesday, November 13, 2007

Review #7 - Kick-plate Drawers

The kickplate drawers are great - now that they are in. I will rate these a 3 - I like the resutlts, but I could have done these differently.


I made the bases out of 2x4s, and screwed the drawer slides to the sides. Once these bases were in place, I screwed the cabinets to them.


So what didn't work so well? The 2x4's ended up having either a slight twist or warp to them. When I attached the drawer slides to them, they were a obviously off as well and needed to be adjusted. There is not a lot of room under there to do the adjusting, so it was a bit frustrating. I ended up shimming them to get them aligned well enough for smooth operation. Lucky I didn't build the drawers until after I did this, or they would have been slightly too wide.

What would I have done diffferent? I would have glued and screwed 2 pieces of 3/4 plywood together instead of 2x4's. This would have made a much straighter, stable frame for the slides - no shimming required.

One final positive note, making these drawers extra wide (34 inches) was a good idea. My DW can easily large flat stuff.

Monday, November 12, 2007

Review #6 - TV in the Kitchen

I wanted to rate the TV in the kitchen as a "must do", but my DW and daughter insisted I rate it "nice to have" but not required. This was an addition to the kitchen late in the remodel project.

Here is a picture of with all the final cabinet work done.


Positives:
  • It's nice to have the TV available when my DW is cooking in the kitchen (she loves cooking and football).
  • We only have one other TV in the house, and this is a good location for the second one.
  • It's great to be able to sit at the bar or kitchen table while watching TV.

Negatives:
  • Maybe we now watch a little bit to much TV...

The installation of the TV was straightforward. Probably the toughest part was running the cable around the house - and there was nothing difficult beyond moving the extension ladder a lot.

The key to a simple install was the panel. Pre-mounting the TV bracket and pre-wiring it for power and cable, made it all go in easily.


One thing I think you must have is a good vent hood. Ours is 250 CFM, and it pulls everything out before it gets up to the TV. Also, the TV sits just a bit back from the hood mantle, so any rising smoke or steam goes past it.

Sunday, November 04, 2007

Review #5 - Pegasus Granite Sink

I will rate the ganite sink a 5 - must do and would do the same again. We have had the sink in place for almost a year - it still looks and functions like new.


Sink Quality:

  • Black granite finish still looks great
  • Easy to clean
  • No problems, leaks, etc.
  • At $280, we were happy with the price.

Installation:

  • The ledger and poly glue method worked great, creating a fully supported and water-proof seal. What if need to take it out some day? I'll worry about that later. Even if I used clips alone, I would not be able to get the thing out of the cabinet. If it ever comes out, it comes out with a hammer.
  • I left a generous reveal around the sink to help keep water off the counter, and give a back-space to put the strainer, etc. I like this set-up - I think it keeps the counter cleaner, and looks fine.
  • I did a final seal of the sink to the granite counter with epoxy grout. Works great.

Summary:

  • The black sink looks good with the tan-brown granite and cherry cabinets. I think it is a classic look that won't become dated in the coming years.

Possible Improvements:

  • I think this is a good product, but the information available on it is pretty poor. I know it's made by Blanco for Home Depot, so I did some research on that before deciding to use it. I think HD could do a better job with their online promotion of specialty products.

[Link to all sink entries]

Saturday, November 03, 2007

Review #4 - Adding Beadboard to the Cabinets

For our kitchen style, this was a "must have", no question. On the cherry cabinets, we added cherry beadboard plywood. The island and hutch have the traditional beadboard strips applied.

Since posting on this, I have received a number of inquiries on how to apply the beadboard to the sides of the cabinet, so I will give some additional detail here.

First off, is it worth the price?
  • I would say yes. It's a relatively cheap upgrade that significantly changes the look of the cabinets. The plywood cost about 70 cents per square foot, and the pine strips 1.20. Considering we found the plywood at a discount lumber place and got a really good price, you could use 1.50 per sq ft to estimate the material cost. Note that we are in Oregon, and it may vary regionally.

What level of skill does it take?

  • From an experience standpoint, I would not suggest someone do this as a first project. Its not that difficult, its just that you should learn on something a bit less visible. My dad always said (and now I say - go figure), "start in a closet". If you have never cut trim or used a saw, I would start on a smaller project to gain some skills. Possibly, putting beadboard on an end table or a kid's dresser.

  • This may sound a bit silly, but you will need to know how to hammer a nail without bending it over. Bent nails will damage the beadboard and tick you off. Two things: hold the hammer at the end (don't choke up on it), and nail small nails with your wrist.

  • You can do either strips or a sheet of plywood or MDF.
How to install?

  • I am not going to do full write up on this, when This Old House provides a really good article on how to get this done. On the page where Tom shows you to start at the corner, start that the front of the cabinet.
  • Here is the detail I will give: The face-frame of cabinets typically have a 1/4" to 3/8" overlap from the side to allow you to apply end panels or beadboard. The diagram below shows how I did it (click to enlarge)
  • One more tip: use glue and keep the nails to a minimum. If you have access to an air-nailer, 18-gage nails will make the job pretty easy. You can hand nail, but it will take a bit more time. I suggest using poly glue (Gorilla Glue, Elmers Nano Glue, etc.), since the sides of your cabinets will likely have either a melamine surface or a sealant. Wood glue will not work well on anything but a raw wood surface.

Pictures


Additional reference

Friday, October 26, 2007

Review #3 - Epoxy Grout - Must Have

I am rating epoxy grout a 5 (must have) for the kitchen. We have had it in the counter-top joints for over six months, with absoultely no staining or other problems. It looks the same as the first day it was installed.


We used it both on the granite counter and in the backsplash.
Here are my "cons" about epoxy grout.
  • Expensive. We probably spent a total of $75 to do everything. But you don't have to spend money on sealers, cleaners, etc. Also, all your hard work stays looking good.

  • A bit hard to work with. If you have never grouted before, this is not the place to start. It hardens pretty fast, and can't be cut with water to give you more time. That being said, its not that much more difficult to get it into the joints.

  • Not sold in many places. Lowes carries SpectraLock.


Things you should remember if you use it:

  • Use a drop cloth - it sticks to everything. Also, mask off areas you want to protect.

  • Work the grout in with a rubber float. A stick, sponge or rag doesn't seem to work very well.

  • Have a helper who can do the cleaning while you are continuing to grout

  • You can a mix it a little "wet" (less sand) as described in the instructions, I suggest you do it. It extends the open time.

  • You can mix sand colors to get exactly what you want. The sand is the cheap part.

  • Keep your joints small (1/8" max), or it will cost you an arm and a leg.

Saturday, October 20, 2007

Review #2 - Pull out Shelves - Good Choice

I am going to rate adding pullout shelves a must-have as a feature, but good-choice for my design.


There is no way we would go back to regular shelves. It is amazing how much more convenient these are than regular ones, especially the lower ones. No more getting on my hands and knees to get the container for left-overs out. I notice we are all much more motivated to put the dishes way with these in place.

Review of the design:
  • Using laminated pine boards - really good. Once stained they have a nice warm color that goes well with the kitchen colors

  • Using butt-joint construction with poly glue and deck screws - great. I could have dadoed these, or even applied dovetails, but I don't think it would have added any needed strength. I did a test piece with just the poly glue on a clamped butt-joint. Once dry, when I broke it apart, it took wood with it, keeping the glue intact. Adding 2" deck screws to this, ensured it was going nowhere.

  • 3/8 pre-finshed plywood bottoms - great. The poly glues to the pre-finshed surface well, again taking wood away when break-tested. I glued the these into bottom rabbet joints, and used 1" crown staples to hold them in place (spaced about every 6 inches).

  • Full extension drawer slides - must have; no brainer.

  • Shelf width - I would have done this differently. I mounted the drawer slides the inside of the face frames and made the shelf widths to match (1 inch less then the opening). With 1/2 offset hinges on the cabinets doors, the shelves hit the doors and wouldn't slide out. I needed to adjust the hinges to the max outward position, giving a 5/8 offset - now the pave between the sets of double doors had a 1/2 gap. I decided rather than rebuild the drawers to be 1/2 less in width, I would put back strips between the doors. With a more rustic style, this looks fine - but if we had a modern style, it would be ugly. The fix was pretty minor over all. Lessoned learned: make sure you compensate for the shelf sliding past the drawer. the best case would have been to go with 5/8 offset hinges, and build the doors accordingly.
My favorite feature assocated with this is the pull-out toaster. In place for months now, and not a crumb to clean up in the morning. Note: for safety, I put a 20-gage piece of sheet metal on the bottom of the shelf above as a heat shield. It might be overkill, but $2 and 10 minutes work is worth it for the precaution.

Wednesday, October 03, 2007

Review #1 - Design Software - Must Have

As stated earlier: Now that the kitchen is complete, I am looking at what we did to see how it went. I hope to learn something from the experience I can apply to future projects.

Ratings:
5 - Would do it exactly the same way again
4 - Very good choice - maybe some slight room for improvement
3 - Good choice - some areas for improvement, but overall satisfied
2 - Not so good choice - should have done it differently
1 - Bad choice - what was I thinking?

Using design software: I am going to rate this a 5 (must do). The $100 and the time to learn how to use it were very well spent. Here are examples of the model vs the actual...


Having this was critical to seeing if our plan was going to look the way we wanted it to. Sketches are one thing, but a model that you can drive around and look at is a big advantage.
Downsides: It takes a bit of time to learn how to use it to the extent your can create a full model, and it takes a while to do the full model. This being said, it takes a lot longer to rip out your work when you and your DW had a different idea of it was going to look like.

Saturday, September 08, 2007

The Kitchen is 99.9% Done

We did the final touch-up on the cabinet trim: filling, sanding, touch-up staining & re-sealing My DW unpacked her display china and put it up on the soffit shelf. Here are a couple of pictures...


Its a bit of extra work to "ease" all the mitered corners, but I really like the effect. I makes the cabinets look like they have been in place for a long time. Also, if any corners do get hit, the chance of damage is lower.

A note on the soffit: We are happy that we left it in, and modified it to match the new layout. In our last kitchen, we had the standard cabinets and displayed stuff on top of them. I think the area was too deep, so it collected a lot of dust, and didn't really show anything off. Adding the shelf created the country look we wanted.

...The only things left to do are installing the kick-plate drawers and cutting boards this weekend. There is still some trim work to be done on walls - crown and shoe moldings - but I am waiting to do it with the dining and living rooms after we paint (it never ends!)

Saturday, August 25, 2007

Details, details...

We finished up the hutch yesterday - every last detail, including accent lighting, which was a last minute decision. I considered adding lighting inside the cabinets, but thought better of it. I want the hutch to be well lit, but not stand out too much.


These are the same 4 inch can lights we put around the fireplace - they sit about 4 inches out from the top of the hutch. The end up costing about $25 each with the can and trim included. I wired them into the same circuit as the dining room light, so that the hutch will be highlighted when the lights are on. I am not a fan of a lot of switches - too complicated. I want some level of control, but not a bank of 4 to 5 switches for a single room.

I also glued on the fruit carvings we purchased a while ago, using poly glue (not too much!) The stain really brought the showdow lines of the carving out.


Here is a link to the post about purchasing the carvings from Outwater. I needed to cut the ends off, carve and sand them to shape, since they are designed to be attached in a longer chain with dowels.

Saturday, August 11, 2007

Chocolate

Chocolate is a "hobby" of my DW. She wanted to create a small display area for cooking stuff, so I built (and she painted) the black shelf that is holding the chololate mold and cookie cutters. She changes the cutters for each season.


This is a closer picture of the Dutch chololate candy mold on the shelf. I bought this on a trip to Holland a couple of years ago.


Here is a close-up of the mold set, showing the best elements of Nederlands life: a Dutch boy and girl, boating on a canal, a windmill, tulips and the Queen's symbol.

We bought the French signs at Target (so much for authenticity...)

Finally, if you want to buy the best chocolate in the world (my opinion), follow this link (sorry, the site is only in Dutch, but you can give them your info to get a brochure).

Friday, August 10, 2007

Added a Ceiling Beam

I installed the wooden ceiling beam this evening. No distasters, in fact, the whole thing took about an hour and a half, and turned out well.

The goal of putting the beam in was to create a simple visual boundary between the kitchen and the dining area, and break up the ceiling. It also makes the kitchen feel a bit more rustic.


How to installed beam:
  • Mark the ceiling and drill holes for the lag bolts (7 inch long) - I used six to hold the beam. These go into the 2x4 truss above ceiling
  • Cut the beam 1/4 inch longer than the space it needs to go into
  • Cut a hole in one wall the size of the beam
  • Lift the beam, slide it into the hole, bring it up into place, and slide it solid against the other wall.
  • Use upright 2x4's on each end (with some small peices of wood for protection) of the beam to hold it into place.
  • Lag bolt the beam from above
  • Drill and lag bolt the end of the beam that is not in the hole (picture below)

The bolt will be covered by the crown molding.

The other end sits in hole and "floats". This allows for the beam to expand and contract without pulling away from the wall and leaving a gap. Since I bought "green" douglas fir, I expect a slight shrinkage.

The cost of the 10ft beam and lag bolts $20.

Saturday, August 04, 2007

Details...

I am down to the final details of the kitchen. I spent most of the day milling, sanding and staining cherry moldings.

I also bought the 4x6 beam to mount in the kitchen (details a couple of post ago). I got it cleaned up with an portable planer, sanded and stained. As a side note, I am really impressed with Ryobi tools - good price, reliable under DIY use, and they sell pretty much everything you need.


Remaining things to do:
  • Trim out the edges of the cabinets (need to make the trim)
  • Give all the cabinets touch-up staining and a final coat of sealers - my DW does a better job at this than I do.
  • Finish the kick-plate drawers
  • Complete some hardware, hang a few doors and drawer fronts
  • Brocade the ceiling where patched
  • Hang the beam
  • Put of crown molding
  • Put shoe molding (maple to match the floor) around everything

Once this is done (hopefully all in August), I start on the remodel of my daughters bedroom - adding a walk-in closet. I will track this on my full-house blog: Greengate Ranch Remodel


Greengate Ranch Remodel Blog

Sunday, July 29, 2007

Building and Installing the Soffit Shelf

I fabricated the shelf that goes around the kitchen soffit. I glued and air-nailed 1/8 cherry plywood to a center core of 1/2 maple plywood. I left the center set back as shown to allow of it to mount to the strips I attached to the soffit.


Here are a couple of pictures of the strips. These are poly glued and air-nailed with 1.5 inch nails. I used a little marking fixture to mark the bottom of the strips all the way around before trying to mount them.


When I mounted the shelves on the strips (tapped it in place with a mallet), I had the unexpected result of having them stay up on their own. Once I put the 45 degree corner peice in place, it became very solid.

I had to basically build the corner piece in place, buy marking, cutting, then hand planing the pieces to fit. If everything were perfect, the piece would have 22.5 degree sides. In this case, they ended up being 21 on one site and 24.5 on the other. It takes a little while to get a good fit, but having tight joints is worth it.

Here are the shelves installed - I still need to put the front trim strip on, which will be dadoed to help provide good support, and allow me to blind nail it.

I have some cast iron 90 degree brackes I will put on top the shelves to reinforce them, and add some decoration.

Here is a picture of the kitchen - getting close to complete.


Saturday, July 28, 2007

Adding a Ceiling Beam to the Kitchen Plan

I have decided to add a ceiling beam across the front of the kitchen. Here is the 3D model showing how it will look.

If our ceiling height was 9 feet instead of 8, I would do a more extensive layout. Things being what they are, I am going with a single beam.

Reasons for doing it:
  • It helps define the "boundary" of the kitchen. I think having this definition improves the overall design, without closing anything in. I also ties the soffit in
  • It adds a bit of a rustic feeling, which is what we are looking for: rustic feeling, high quailty workmanship.
  • Its not expensive to do. I will fabricate a hollow beam out of #1 pine and mount it to a ledger piece screwed through the ceiling to the truss. I estimate $40 or less.

Monday, July 23, 2007

Toys in the Attic

Actually, we have no toys in our attic - only a bunch of cellulose insulation and lights that are in the wrong places. I spent all Saturday moving lights, installing new ones and patching the holes - yuck. Our house is a ranch style with a 4-12 pitch roof, so in some cases I had less than a foot and a half of head-room to work. Lucky I am only 5' 8", or I may still be stuck up there.

Technically, this is not in the "kitchen", but it's close - the built-in hutch backs up to it. Since I needed to move the dining room light (they did not center it in the middle of the room - go figure), I decided to get all the attic work done in one shot.

Now that I'm done complaining... the lights turned out well. Here is a picture of the accent lights I installed around the fireplace.


The lights shine down the stone and highlight it, which really improves the way it looks. There is one on the end (shown) that you see when you first come into the house, and there are two over the mantle to draw attention to the pictures set there.

These are 4" recessed cans with standard trim, which run about $25 each.

One of the nice features of the house is that the fireplace is in the center (click here for the details from when we rebuilt it). Frank Lloyd Wright referred to the fireplace as the "heart of the home", and often insisted that it be the main focal point of the house.

  • From an article on Wright's design: The fireplace hearth is the center of the house as Wright felt the hearth was the heart of the home and, indirectly, the family. This is not only the center of the home but of the family.

Here is a fairly good article on lighting, that may give you a few ideas.

Sunday, July 15, 2007

Traveling...

All in all, traveling for work stinks. Lots of time in airports, on planes, on trains... none of which are really very fun if you do it regularly. Also, being away from my DW and kids is a bummer.

The one good thing about it all, especially being in Europe a lot of the time, is being able to find stuff to bring home you are not going to likely find at Pottery Barn or Crate & Barrel.

I found this container for my DW in a small Belgian / French kitchen shop for about $15.


I took the picture with my cell phone, so the quality is a bit low.

Here is a picture of the shop (click picture for the web site). They were really nice people. If you are ever in western Europe, make a trip to Brugge, where the store is at - you won't be disappointed. They told me they don't have an online store, because their stock changes regularly.


If you are in western Belguim and need a place to stay, I suggest taking a look at the link below. This bead and breakfast is owned by the same people: http://www.arkvanzarren.be/arkvanzarren_english/the%20rooms.htm

Monday, July 09, 2007

TV in Kitchen Complete

I completed the installation of the TV above the range hood. Here is a picture of the opening before installing the panel.


Below is the panel installed with power, coaxial, and the TV mount. It's removable (held in place by 3 screws), so we can get to the top of the vent hood. The top trim piece is attached to the soffit - the weight of the TV and mount bascially hold the panel against it.


Building the panel was pretty simple. I glued the beadboard to a piece of 1/2 maple plywood. I also glued and screwed some 1 x 3 vertical support strips to that - so it will won't warp under the weight of the TV & mount.

Here is the TV on, of course being tuned to Food Network...

Here is the TV extended on the artulating arm, which allows it to be viewed from the dining room table (however, watching TV while eating dinner ain't gonna happen).


Friday, July 06, 2007

Adding a TV to the Kitchen Plan - $450

A friend of mine suggested that the space above the range hood would a be a great place for a TV in the kitchen. After discussing it with my DW, we decided to add it to the plan. We have only ever had one TV, so this is kind of a big deal. The pictures below show where we are going to place it.


We hoped to get at least a 19" TV up there. Many of them are just a bit to tall to fit into the space. Costco carries the Vizio brand, and the 20" one just fits. Its 14" high, and the opening is 14.5". Cost for the TV was $370, which is competitive with other HDTV models of this size.

We are going to mount the TV with a full articulating arm, so that we can swing it out to watch it from the kitchen table if needed. Its made by Peerless. We also bought this at Costco for $80.

Now I need to design a panel that will fit up there and securly hold the weight of of the TV extended out to 20", and run the coax cable...