My New Blog: TF Workshop

Showing posts with label Drawers. Show all posts

Saturday, January 06, 2007

Drawers Installed

Today we installed all the drawers and pull-out shelves on the wall cabinets.


This is a pull-out shelf for plates.

Tips for building your own drawers / pull-outs and installing them:
  • Normal drawers slides require that the drawers be 1" less than the width of the opening. Plan on making them 1-1/16" thinner instead. If they are an extra 1/16" too thin, you can shim the slides if needed. If they are 1/16" too wide, they may bind and there is little you can do about it except build a new drawer.

  • They are going to likely pick up some dust and debris. Clean and lube them before you install the drawers.

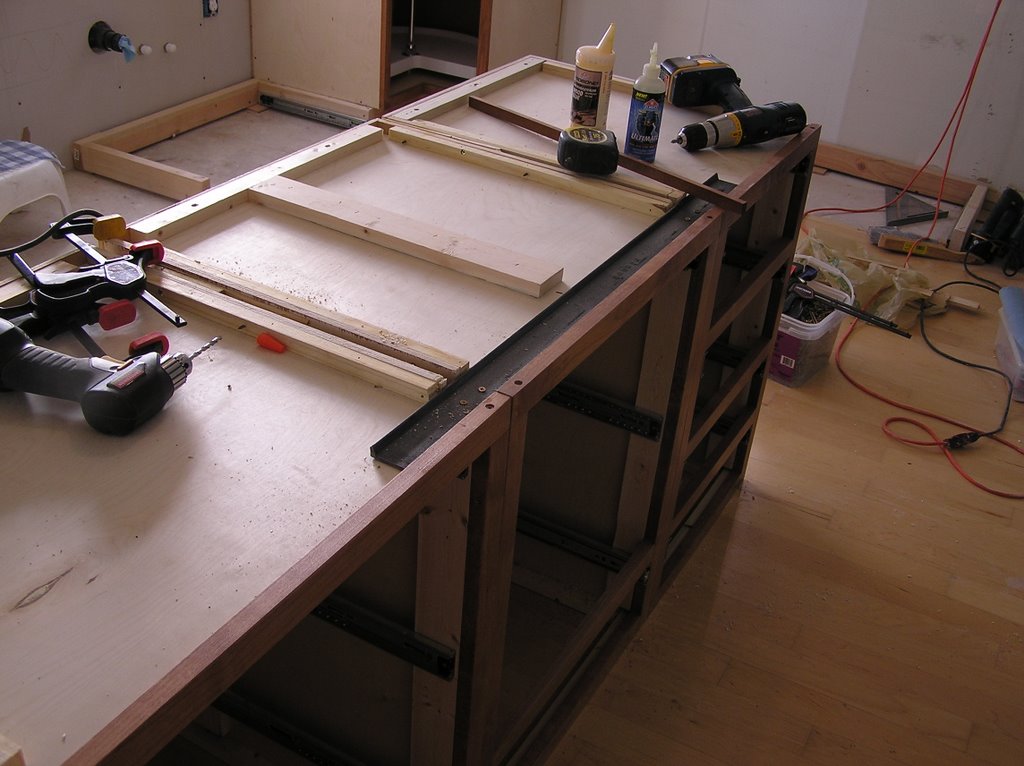
  • Use a fixture to mount the slides to inside of the cabinets. Below is a photo of the one I made. I clamp it to the face-frame of the cabinet and use a self-centering bit to drill the pilot holes for the slides. There are two sets of holes - one for drawers and the other for shelves (they need to sit back behind the doors).


You can get self-centering bits at any hardware or building store. They are typically used for drilling hinges on doors.


Click for photo set

Saturday, December 30, 2006

Drawer Construction Continued...

All the boxes (21 of them) for the wall cabinets are ready for final assembly tomorrow. These are for the drawers and pull out shelves.

Since we are building the cabinets ourselves, we decided that every shelf below 4 feet is going to be pull-out. The extra labor will be worth it in the long term. Its about $20 for materials per pull-out shelf, including the full-extension slides.


I have 3/8" pre-finshed maple plywood from Shurway Building Center for the bottoms of each of these. There are a couple of shelves that will hold plates - on those I will use 1/2 inch.

We will need to do this all over again for the island and hutch later in January.

Wednesday, December 27, 2006

Building Drawers Boxes

I finally decided to make the drawer sides out of laminated pine. I planned on using plywood, but didn't want to go through the work of edge banding all the pieces. Also, if they get damaged (we have 4 kids...), the ply shows through.

I bought the pine at Home Depot at $12 for a 18" x 48" x 5/8" piece. The drawers took 8 pieces so far. I think I will need about 12 more pieces for the island drawers and all the pull out shelves. I'll tally the costs once complete.

Here are all the rough cut pieces:


Process steps to get drawer parts:
  • Cut the pieces to width and length plus at least an inch
  • Use a jointer to plane off the saw marks
  • Route 1/8 round-overs on all for corners (along the length)
  • Use dado blade to cut in the recess for the drawer bottom
  • Cut the pieces to final length
  • Drill holes for assembly screws
  • Sand with 220 grit
Below are a couple of pictures of the the drawer assembly table I use. It allows me to clamp the drawer parts while screwing them together.


I used 1 5/8" sheetrock screws and a good bead of wood glue on the corners. I found that lubricating the screws before driving them makes a big difference. They go in much smoother and rarely strip. I have used liquid soap, Carmex, and grease - and all work well. This time, I tried dipping the tip of the screws in polyurethane glue, which also allowed for easy driving. I am assuming this will bond the screws in place as an added bonus.

I used the acbinet face-frame stain for the drawers to match the cherry. It looks a bit different on the pine, but should blend in well. My simple drying rack is a rope tied across the garage. The hooks are peices of 12 gage wire with a twisted loop on one end and wrapped around the rope on the other.

Once the stain is fully dry (tomorrow), I will spray these with three coats of polycrylic, lightly sanding in between.

Saturday, November 25, 2006

Cabinet Install & Kick-plate Drawers

We installed most of the cabinets today, getting about 80% complete. I plan on finshing them off in the morning and getting the base of the counter top in. The soffits lined up pretty much exactly as planned.

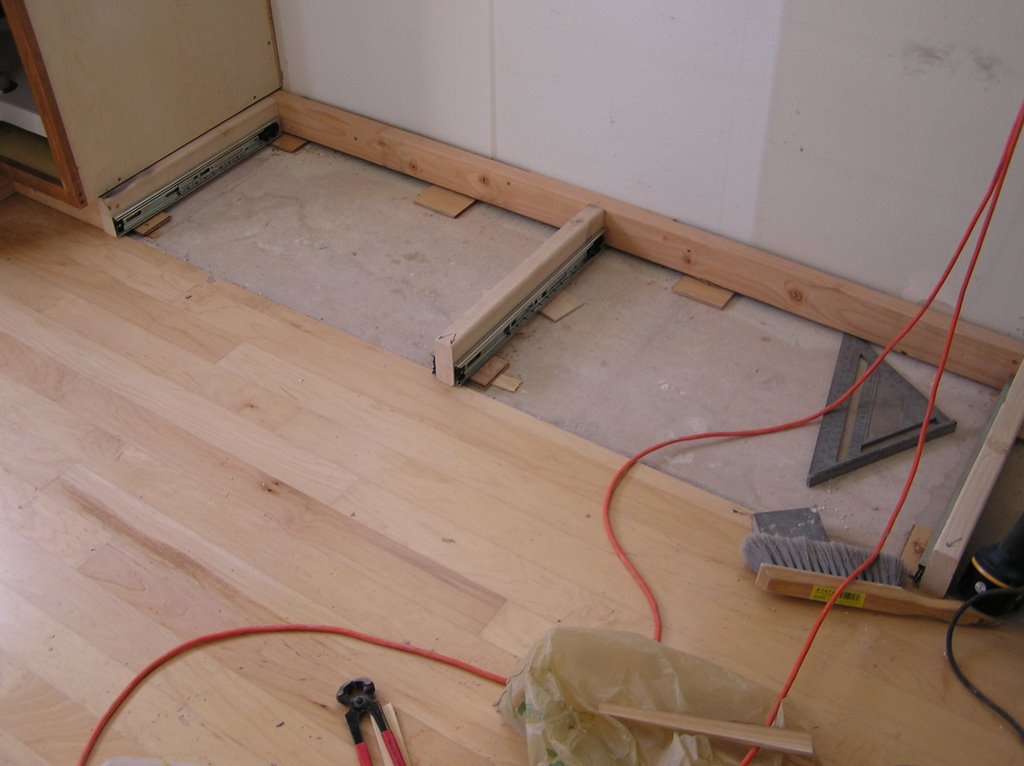
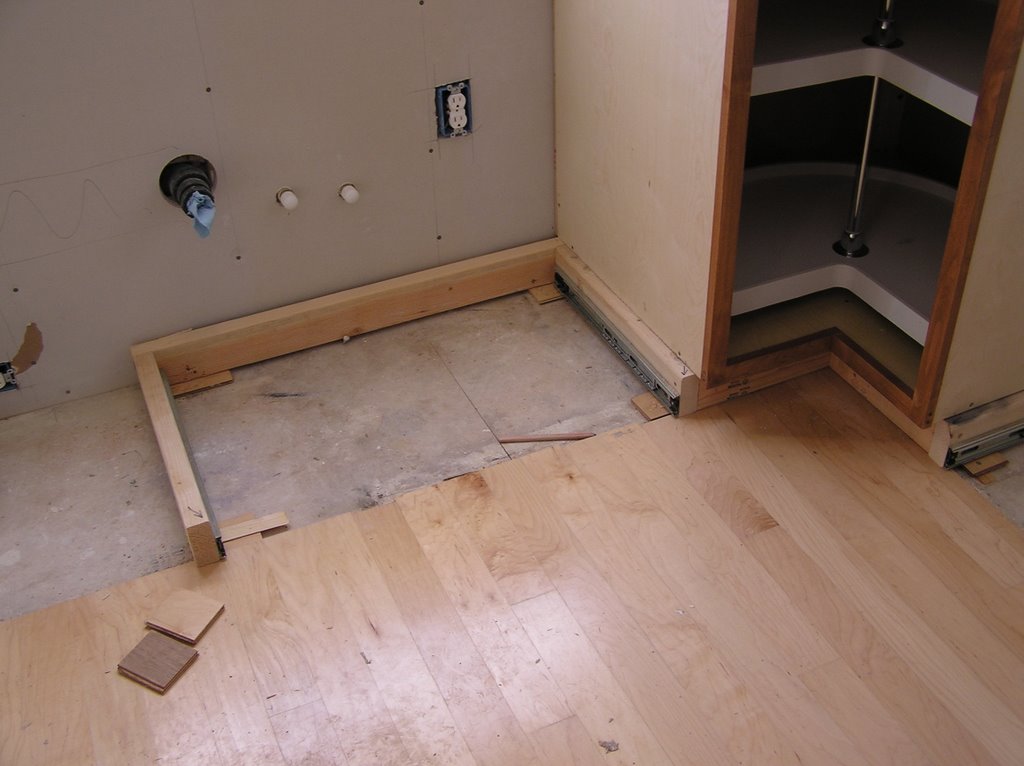
Notice under the some of the cabinets there are open spaces - these are for the kick plate drawers.


Here are the base assemblies, made of 2x4. We mounted full extension drawer slides to the interiors.


We want to make these drawers as wide as possible. Where the drawer is wider than a single cabinet, I supported the them with a piece of steel channel underneith. These are glued with polyurathane and screwed in place.