My New Blog: TF Workshop

Sunday, July 29, 2007

Building and Installing the Soffit Shelf

I fabricated the shelf that goes around the kitchen soffit. I glued and air-nailed 1/8 cherry plywood to a center core of 1/2 maple plywood. I left the center set back as shown to allow of it to mount to the strips I attached to the soffit.


Here are a couple of pictures of the strips. These are poly glued and air-nailed with 1.5 inch nails. I used a little marking fixture to mark the bottom of the strips all the way around before trying to mount them.


When I mounted the shelves on the strips (tapped it in place with a mallet), I had the unexpected result of having them stay up on their own. Once I put the 45 degree corner peice in place, it became very solid.

I had to basically build the corner piece in place, buy marking, cutting, then hand planing the pieces to fit. If everything were perfect, the piece would have 22.5 degree sides. In this case, they ended up being 21 on one site and 24.5 on the other. It takes a little while to get a good fit, but having tight joints is worth it.

Here are the shelves installed - I still need to put the front trim strip on, which will be dadoed to help provide good support, and allow me to blind nail it.

I have some cast iron 90 degree brackes I will put on top the shelves to reinforce them, and add some decoration.

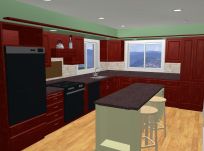
Here is a picture of the kitchen - getting close to complete.


Saturday, July 28, 2007

Adding a Ceiling Beam to the Kitchen Plan

I have decided to add a ceiling beam across the front of the kitchen. Here is the 3D model showing how it will look.

If our ceiling height was 9 feet instead of 8, I would do a more extensive layout. Things being what they are, I am going with a single beam.

Reasons for doing it:
  • It helps define the "boundary" of the kitchen. I think having this definition improves the overall design, without closing anything in. I also ties the soffit in
  • It adds a bit of a rustic feeling, which is what we are looking for: rustic feeling, high quailty workmanship.
  • Its not expensive to do. I will fabricate a hollow beam out of #1 pine and mount it to a ledger piece screwed through the ceiling to the truss. I estimate $40 or less.

Monday, July 23, 2007

Toys in the Attic

Actually, we have no toys in our attic - only a bunch of cellulose insulation and lights that are in the wrong places. I spent all Saturday moving lights, installing new ones and patching the holes - yuck. Our house is a ranch style with a 4-12 pitch roof, so in some cases I had less than a foot and a half of head-room to work. Lucky I am only 5' 8", or I may still be stuck up there.

Technically, this is not in the "kitchen", but it's close - the built-in hutch backs up to it. Since I needed to move the dining room light (they did not center it in the middle of the room - go figure), I decided to get all the attic work done in one shot.

Now that I'm done complaining... the lights turned out well. Here is a picture of the accent lights I installed around the fireplace.


The lights shine down the stone and highlight it, which really improves the way it looks. There is one on the end (shown) that you see when you first come into the house, and there are two over the mantle to draw attention to the pictures set there.

These are 4" recessed cans with standard trim, which run about $25 each.

One of the nice features of the house is that the fireplace is in the center (click here for the details from when we rebuilt it). Frank Lloyd Wright referred to the fireplace as the "heart of the home", and often insisted that it be the main focal point of the house.

  • From an article on Wright's design: The fireplace hearth is the center of the house as Wright felt the hearth was the heart of the home and, indirectly, the family. This is not only the center of the home but of the family.

Here is a fairly good article on lighting, that may give you a few ideas.

Sunday, July 15, 2007

Traveling...

All in all, traveling for work stinks. Lots of time in airports, on planes, on trains... none of which are really very fun if you do it regularly. Also, being away from my DW and kids is a bummer.

The one good thing about it all, especially being in Europe a lot of the time, is being able to find stuff to bring home you are not going to likely find at Pottery Barn or Crate & Barrel.

I found this container for my DW in a small Belgian / French kitchen shop for about $15.


I took the picture with my cell phone, so the quality is a bit low.

Here is a picture of the shop (click picture for the web site). They were really nice people. If you are ever in western Europe, make a trip to Brugge, where the store is at - you won't be disappointed. They told me they don't have an online store, because their stock changes regularly.


If you are in western Belguim and need a place to stay, I suggest taking a look at the link below. This bead and breakfast is owned by the same people: http://www.arkvanzarren.be/arkvanzarren_english/the%20rooms.htm

Monday, July 09, 2007

TV in Kitchen Complete

I completed the installation of the TV above the range hood. Here is a picture of the opening before installing the panel.


Below is the panel installed with power, coaxial, and the TV mount. It's removable (held in place by 3 screws), so we can get to the top of the vent hood. The top trim piece is attached to the soffit - the weight of the TV and mount bascially hold the panel against it.


Building the panel was pretty simple. I glued the beadboard to a piece of 1/2 maple plywood. I also glued and screwed some 1 x 3 vertical support strips to that - so it will won't warp under the weight of the TV & mount.

Here is the TV on, of course being tuned to Food Network...

Here is the TV extended on the artulating arm, which allows it to be viewed from the dining room table (however, watching TV while eating dinner ain't gonna happen).


Friday, July 06, 2007

Adding a TV to the Kitchen Plan - $450

A friend of mine suggested that the space above the range hood would a be a great place for a TV in the kitchen. After discussing it with my DW, we decided to add it to the plan. We have only ever had one TV, so this is kind of a big deal. The pictures below show where we are going to place it.


We hoped to get at least a 19" TV up there. Many of them are just a bit to tall to fit into the space. Costco carries the Vizio brand, and the 20" one just fits. Its 14" high, and the opening is 14.5". Cost for the TV was $370, which is competitive with other HDTV models of this size.

We are going to mount the TV with a full articulating arm, so that we can swing it out to watch it from the kitchen table if needed. Its made by Peerless. We also bought this at Costco for $80.

Now I need to design a panel that will fit up there and securly hold the weight of of the TV extended out to 20", and run the coax cable...

Sunday, July 01, 2007

Travertine Backsplash #7 - Done!

We grouted the backsplash today, using a "slate gray" color to contrast the travetine. It shows the joints nicely without giving too much contrast.

We used epoxy grout (same as the granite counter tops). Its expensive - it took 4 "kits" at $20 each for $80 - but it is worth it. Having a fully stain-proof backsplash is a good long-term investment.

I don't really enjoy working with this stuff, since it sets up pretty fast with no way to wet it back down. The kits make a small amount, so it's doable. If you have not grouted before, I would not recommend starting with this. But if you do have experience, give it a shot. I would not do a kitchen area with anything else. Also, clean-up is pretty easy.

Here are some additional pictures...


We will seal all of this tomorrow and call it done. Was it worth all the effort? Yes.

The epoxy grout we used is Spectralock by Lactrite.

Travertine Backsplash #6

Here is a picture of the harlequin backsplash fully in place and taped up. It looks a little goofy now, but it turned out great.


Here is with the tape off, not yet grouted. We are very happy with the resutls...


To cut the diamond tiles correctly, you really need a holding fixture. It doesn't need to be fancy, it just needs to support the pieces well. I cut this out of a piece of scrap wood - it slides along the straight-edge on the sled.


A tradition we have : The "owner" always put our favorite piece in (the last one). Here is an action shot of my DW's hand at work.