We decided to make them 13.5 inches deep instead of 12. This will allow for both a 3 inch spice rack on the doors and a 10 inch lazy susan or pull out system. This is also what we estimated the max depth could be and allow my DW to be able to clearly see under them.
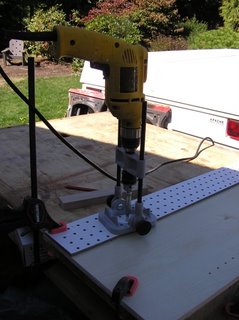
I needed to drill lots of little holes for the adjustable shelves (all the lowers will have pull-out shelves). I like to have them every inch, to allow for fine adjustment. I have done this on a drill press before with each hole marked, but it was a lot of work.
I put together the template system below, and I can drill all the holes in a cabinet side in about 3 minutes. The template is a piece of melamine-covered pegboard with a plywood straight-edge attached to it . I have self-centering bit and a drill aligner set up - almost impossible to go wrong.

Here are the holes...
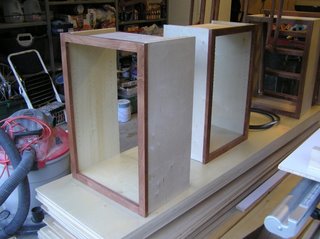
Here are a couple of the cabinets assembled. The are held together with glue and nails I shoot in with my air nailers - 1/4 crown staples that are 3/4 long to attach the boxes. 1 inch long ones to connect the sides to the tops and bottoms.

I still need to attach the backs. I will do that with the same staples and poly glue. I will put 3 inch wide ledgers in the tops of the backs, just to ensure I have solid structure for attaching them to the walls. Theses will go in with screws.
This has ended up being quite a bit of effort. But I am getting custom cabinets for $2K instead of $12 to $15K - and I enjoy the work.


No comments:
Post a Comment