My New Blog: TF Workshop

Sunday, November 25, 2007

Review #8 - Work Triangle / Island Layout

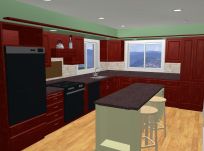
I am going to rate the overall layout and work-flow of our kitchen as a 4 (good choice, slight room for improvement). I did a review of it once it was in, but we have now lived with it for an additional 7 months. Here is the layout...


We now think the location of the fridge is great - not just good, even though it fall outside of what is considered an optimum work-triangle. Here is why:
  • The kids can get to it without interfering with people cooking
  • We easily set stuff on the island
  • You can sit at the island, watch TV and grab the milk without moving!
The space between te island and the fridge wall is OK. 36" has not been a problem at all. We can still sit at the island and have someone move behind us. Would 6 inches be better? Yes - but it's not a killer

42 inches between the island and the counter is great. I would not change this, even if I had the room to do so. The max I would want is 48 - any wider and it would not be easy to reach from one side to the other.

Island at 30" x 90" is great. It could be 36" wide, but no wider - too hard to reach across. The kids are able to sit and do homework at the island while my DW is working with no problems. Anything longer than 90" would make the trip around the island too long.

So if I design a new kitchen, it will be 12" wide - 24" for the counter, 42" isle, 36" island, 42" isle.

The pot rack over the island works really well. It provides a lot of storage, does not block cross-views, and looks nice.


More how-to detail in my article library on eHow...

Tuesday, November 13, 2007

Review #7 - Kick-plate Drawers

The kickplate drawers are great - now that they are in. I will rate these a 3 - I like the resutlts, but I could have done these differently.


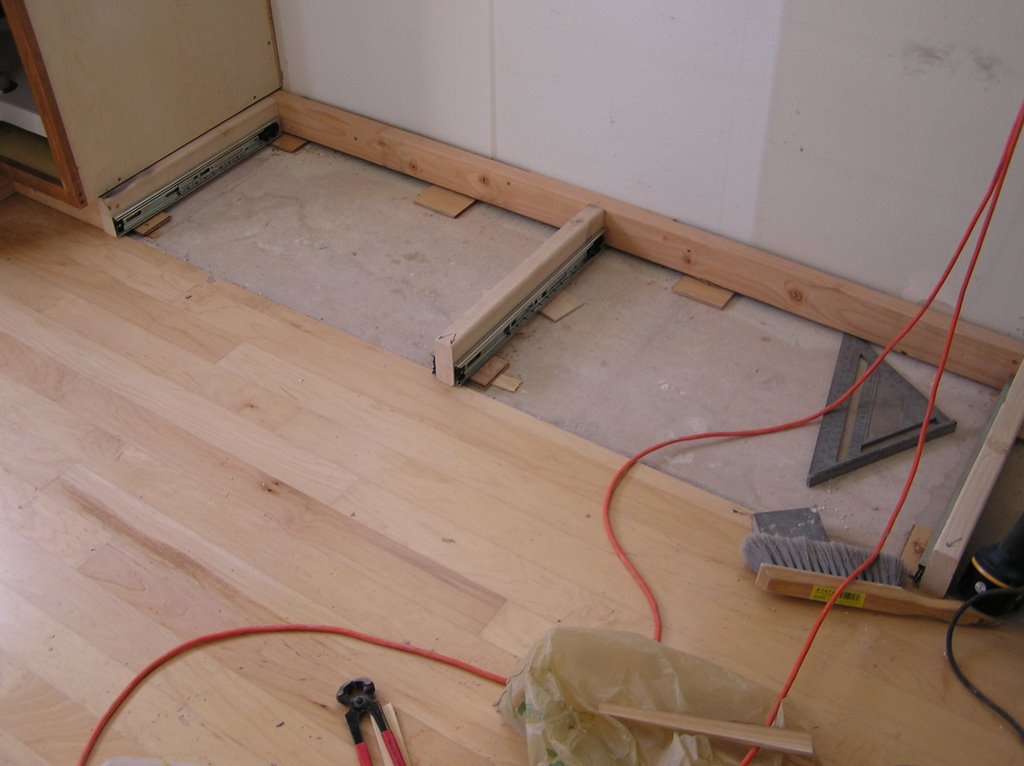
I made the bases out of 2x4s, and screwed the drawer slides to the sides. Once these bases were in place, I screwed the cabinets to them.


So what didn't work so well? The 2x4's ended up having either a slight twist or warp to them. When I attached the drawer slides to them, they were a obviously off as well and needed to be adjusted. There is not a lot of room under there to do the adjusting, so it was a bit frustrating. I ended up shimming them to get them aligned well enough for smooth operation. Lucky I didn't build the drawers until after I did this, or they would have been slightly too wide.

What would I have done diffferent? I would have glued and screwed 2 pieces of 3/4 plywood together instead of 2x4's. This would have made a much straighter, stable frame for the slides - no shimming required.

One final positive note, making these drawers extra wide (34 inches) was a good idea. My DW can easily large flat stuff.

Monday, November 12, 2007

Review #6 - TV in the Kitchen

I wanted to rate the TV in the kitchen as a "must do", but my DW and daughter insisted I rate it "nice to have" but not required. This was an addition to the kitchen late in the remodel project.

Here is a picture of with all the final cabinet work done.


Positives:
  • It's nice to have the TV available when my DW is cooking in the kitchen (she loves cooking and football).
  • We only have one other TV in the house, and this is a good location for the second one.
  • It's great to be able to sit at the bar or kitchen table while watching TV.

Negatives:
  • Maybe we now watch a little bit to much TV...

The installation of the TV was straightforward. Probably the toughest part was running the cable around the house - and there was nothing difficult beyond moving the extension ladder a lot.

The key to a simple install was the panel. Pre-mounting the TV bracket and pre-wiring it for power and cable, made it all go in easily.


One thing I think you must have is a good vent hood. Ours is 250 CFM, and it pulls everything out before it gets up to the TV. Also, the TV sits just a bit back from the hood mantle, so any rising smoke or steam goes past it.

Sunday, November 04, 2007

Review #5 - Pegasus Granite Sink

I will rate the ganite sink a 5 - must do and would do the same again. We have had the sink in place for almost a year - it still looks and functions like new.


Sink Quality:

  • Black granite finish still looks great
  • Easy to clean
  • No problems, leaks, etc.
  • At $280, we were happy with the price.

Installation:

  • The ledger and poly glue method worked great, creating a fully supported and water-proof seal. What if need to take it out some day? I'll worry about that later. Even if I used clips alone, I would not be able to get the thing out of the cabinet. If it ever comes out, it comes out with a hammer.
  • I left a generous reveal around the sink to help keep water off the counter, and give a back-space to put the strainer, etc. I like this set-up - I think it keeps the counter cleaner, and looks fine.
  • I did a final seal of the sink to the granite counter with epoxy grout. Works great.

Summary:

  • The black sink looks good with the tan-brown granite and cherry cabinets. I think it is a classic look that won't become dated in the coming years.

Possible Improvements:

  • I think this is a good product, but the information available on it is pretty poor. I know it's made by Blanco for Home Depot, so I did some research on that before deciding to use it. I think HD could do a better job with their online promotion of specialty products.

[Link to all sink entries]

Saturday, November 03, 2007

Review #4 - Adding Beadboard to the Cabinets

For our kitchen style, this was a "must have", no question. On the cherry cabinets, we added cherry beadboard plywood. The island and hutch have the traditional beadboard strips applied.

Since posting on this, I have received a number of inquiries on how to apply the beadboard to the sides of the cabinet, so I will give some additional detail here.

First off, is it worth the price?
  • I would say yes. It's a relatively cheap upgrade that significantly changes the look of the cabinets. The plywood cost about 70 cents per square foot, and the pine strips 1.20. Considering we found the plywood at a discount lumber place and got a really good price, you could use 1.50 per sq ft to estimate the material cost. Note that we are in Oregon, and it may vary regionally.

What level of skill does it take?

  • From an experience standpoint, I would not suggest someone do this as a first project. Its not that difficult, its just that you should learn on something a bit less visible. My dad always said (and now I say - go figure), "start in a closet". If you have never cut trim or used a saw, I would start on a smaller project to gain some skills. Possibly, putting beadboard on an end table or a kid's dresser.

  • This may sound a bit silly, but you will need to know how to hammer a nail without bending it over. Bent nails will damage the beadboard and tick you off. Two things: hold the hammer at the end (don't choke up on it), and nail small nails with your wrist.

  • You can do either strips or a sheet of plywood or MDF.
How to install?

  • I am not going to do full write up on this, when This Old House provides a really good article on how to get this done. On the page where Tom shows you to start at the corner, start that the front of the cabinet.
  • Here is the detail I will give: The face-frame of cabinets typically have a 1/4" to 3/8" overlap from the side to allow you to apply end panels or beadboard. The diagram below shows how I did it (click to enlarge)
  • One more tip: use glue and keep the nails to a minimum. If you have access to an air-nailer, 18-gage nails will make the job pretty easy. You can hand nail, but it will take a bit more time. I suggest using poly glue (Gorilla Glue, Elmers Nano Glue, etc.), since the sides of your cabinets will likely have either a melamine surface or a sealant. Wood glue will not work well on anything but a raw wood surface.

Pictures


Additional reference