My New Blog: TF Workshop

Saturday, December 30, 2006

Drawer Construction Continued...

All the boxes (21 of them) for the wall cabinets are ready for final assembly tomorrow. These are for the drawers and pull out shelves.

Since we are building the cabinets ourselves, we decided that every shelf below 4 feet is going to be pull-out. The extra labor will be worth it in the long term. Its about $20 for materials per pull-out shelf, including the full-extension slides.


I have 3/8" pre-finshed maple plywood from Shurway Building Center for the bottoms of each of these. There are a couple of shelves that will hold plates - on those I will use 1/2 inch.

We will need to do this all over again for the island and hutch later in January.

Thursday, December 28, 2006

Kitchen Windows & Bump Out

The windows were installed a few weeks ago, and I need to catch up on the logging the costs.

Here is the bump out we finally decided on, which still needs to be trimmed out and painted. This adds an additional 2.5" depth, giving 7" for the final sill. This will accommodate the pots for the garden window. I will also add a shelf half way up.


Comparing this option with a pre-fab unit

Pre-fab estimates:

  • Unit cost $800 from HD
  • Window trim $20
  • Total Cost: $820

Bump-out:

  • Window cost $156 from HD
  • Window trim $20
  • Framing lumber $30 (it's really cheap right now)
  • Piece of T-1-11 ply $35
  • Final trim $40
  • I already needed to paint, since I added other siding - a quart would be $20
  • Total Cost: $300
The total cost of windows was this one, plus the other west-facing one that was a simple install. It was another $156 plus $20 for trim, giving a grand total of $480.

So which looks better? It's on the back of the house, so its really not that big of a deal. For me, I prefer the bump-out. I think it fits better into the overall style of the house. We are going to add an exterior window box as well, which would not be possible with the pre-fab unit.

Having the cost at $500 less is another factor. In this case the window fit up under an existing roof overhang. If we would have added another one on the west side, I would add another $100 for cost of putting in a little roof and flashing.

Wednesday, December 27, 2006

Building Drawers Boxes

I finally decided to make the drawer sides out of laminated pine. I planned on using plywood, but didn't want to go through the work of edge banding all the pieces. Also, if they get damaged (we have 4 kids...), the ply shows through.

I bought the pine at Home Depot at $12 for a 18" x 48" x 5/8" piece. The drawers took 8 pieces so far. I think I will need about 12 more pieces for the island drawers and all the pull out shelves. I'll tally the costs once complete.

Here are all the rough cut pieces:


Process steps to get drawer parts:
  • Cut the pieces to width and length plus at least an inch
  • Use a jointer to plane off the saw marks
  • Route 1/8 round-overs on all for corners (along the length)
  • Use dado blade to cut in the recess for the drawer bottom
  • Cut the pieces to final length
  • Drill holes for assembly screws
  • Sand with 220 grit
Below are a couple of pictures of the the drawer assembly table I use. It allows me to clamp the drawer parts while screwing them together.


I used 1 5/8" sheetrock screws and a good bead of wood glue on the corners. I found that lubricating the screws before driving them makes a big difference. They go in much smoother and rarely strip. I have used liquid soap, Carmex, and grease - and all work well. This time, I tried dipping the tip of the screws in polyurethane glue, which also allowed for easy driving. I am assuming this will bond the screws in place as an added bonus.

I used the acbinet face-frame stain for the drawers to match the cherry. It looks a bit different on the pine, but should blend in well. My simple drying rack is a rope tied across the garage. The hooks are peices of 12 gage wire with a twisted loop on one end and wrapped around the rope on the other.

Once the stain is fully dry (tomorrow), I will spray these with three coats of polycrylic, lightly sanding in between.

Monday, December 25, 2006

Pull out Garbage Can Modified and Installed

Well, this is not exactly the most exciting post ever published... I finally got the pull-out garbage can to fit under the sink and work properly. The problem was that it was a bit too tall to fit.

First, I was able to lower the entire assembly by 3/8 of an inch by taking it apart, re-drilling the support holes, moving the screws and grinding the excess off. Lucky I am not getting paid for my effort - I would be getting 25 cents an hour at most.

Second, I rerouted the drain plumbing to the back of the cabinet, as shown.

I read about this technique in a magazine, and I have done our bathroom this way as well. It gives you a whole lot more usable cabinet space under the sink. The trap is hinding behind the disposal. I made sure the long drain pipe from the right sink has good downward pitch. Also, the pre-finished maple plywood shown, along with the poly glued joints, make a very water-resistant cabinet.

To deal with the last 1/4 inch of interference, I ground the back of the garbage can down about 3/4 of an inch.

After all this work, I have to admit I am happy with the result. Everything just fits, and gives my DW the most storage space under there.

Final tip: I did not mount the slide assemblies directly to the cabinet bottom. I put a washer between the wood and the brackets where each screw went in. This gives about 1/16 inch space, so if water does get down there, it will help it dry out faster.

Friday, December 15, 2006

Taking a break and catching up on some reading

Like many of you, I am taking a break from remodeling to enjoy Christmas and the holidays. In the mean time, I am reading through a couple of favorite books on home design:

In general Architecture Week is a very good site for ideas - light on ads and fluff, heavy on ideas and content.


A great place to start is their library page: http://www.architectureweek.com/library.html

Wednesday, December 13, 2006

I started a parent site: Greengate Ranch Remodel


When I started the 10K Kitchen Remodel blog, I really had no idea that other people blogged about the work they did on their homes, houseblogs.net, etc. I quickly came to find out that I am one of the many, not the few.

We purchased our current house to remodel it into what we wanted. The location and land were really what we were looking for, but to get that, we needed to by an older home that was not part of the new developments. If you know the Portland, Oregon area, you know that new homes come on lots the size of a manhole cover.

I will keep up this blog, since it is very specific with planning, costs, suppliers, etc., and continue to build my new one, covering our work on the whole house.

Sunday, December 10, 2006

Trouble with pull-out garbage can

We bought a pull out garbage can from The Container Store - and its about an inch too tall!

I had to move the garbage disposal to the deeper sink, and try to mount the can on the shallow side. Once I started measuring the space against available products, I realized that I would have to do this no matter what.

I made the drain pipe take an immediate out of the sink strainer and moved the trap to the back, and I still have about 1/2 an inch to go. Next I am going to take the metal assembly apart - I figure I can get about 5/8 of an inch by re-drilling the holes, etc. If all else fails, I will cut a little bit off the back of the plastic lip, which I really don't want to do. I am glad that most of the things we are doing don't take this much fiddling... The cost was $49.

In addition to this, we also bought an under-sink wire slide-out organizer for $59.

Total cost $108.

Saturday, December 02, 2006

Break in Holland

I am working in the Neatherlands (Eindhoven) for the next week, so I get a break from the remodel work. I am glad to get a rest from the kitchen, but also anxious to continue the momentum. Once I got the sink in and the water running, I needed to travel.

My DW put plastic down on the plywood countertop base and started using the kitchen. She is really a trooper about the remodel, expertly handling the the dust, dirt and general chaos.

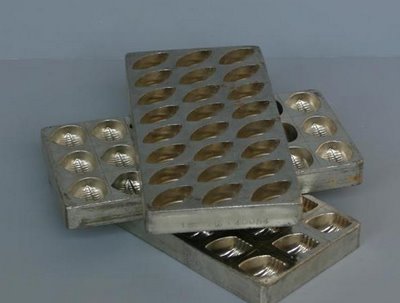
Since I come over here regularly, we have been trying to find antique chocolate molds, waffel irons, etc. to display on the open wall and soffit shelf we are putting in.