My New Blog: TF Workshop

Saturday, October 20, 2007

Review #2 - Pull out Shelves - Good Choice

I am going to rate adding pullout shelves a must-have as a feature, but good-choice for my design.


There is no way we would go back to regular shelves. It is amazing how much more convenient these are than regular ones, especially the lower ones. No more getting on my hands and knees to get the container for left-overs out. I notice we are all much more motivated to put the dishes way with these in place.

Review of the design:
  • Using laminated pine boards - really good. Once stained they have a nice warm color that goes well with the kitchen colors

  • Using butt-joint construction with poly glue and deck screws - great. I could have dadoed these, or even applied dovetails, but I don't think it would have added any needed strength. I did a test piece with just the poly glue on a clamped butt-joint. Once dry, when I broke it apart, it took wood with it, keeping the glue intact. Adding 2" deck screws to this, ensured it was going nowhere.

  • 3/8 pre-finshed plywood bottoms - great. The poly glues to the pre-finshed surface well, again taking wood away when break-tested. I glued the these into bottom rabbet joints, and used 1" crown staples to hold them in place (spaced about every 6 inches).

  • Full extension drawer slides - must have; no brainer.

  • Shelf width - I would have done this differently. I mounted the drawer slides the inside of the face frames and made the shelf widths to match (1 inch less then the opening). With 1/2 offset hinges on the cabinets doors, the shelves hit the doors and wouldn't slide out. I needed to adjust the hinges to the max outward position, giving a 5/8 offset - now the pave between the sets of double doors had a 1/2 gap. I decided rather than rebuild the drawers to be 1/2 less in width, I would put back strips between the doors. With a more rustic style, this looks fine - but if we had a modern style, it would be ugly. The fix was pretty minor over all. Lessoned learned: make sure you compensate for the shelf sliding past the drawer. the best case would have been to go with 5/8 offset hinges, and build the doors accordingly.
My favorite feature assocated with this is the pull-out toaster. In place for months now, and not a crumb to clean up in the morning. Note: for safety, I put a 20-gage piece of sheet metal on the bottom of the shelf above as a heat shield. It might be overkill, but $2 and 10 minutes work is worth it for the precaution.

Wednesday, October 03, 2007

Review #1 - Design Software - Must Have

As stated earlier: Now that the kitchen is complete, I am looking at what we did to see how it went. I hope to learn something from the experience I can apply to future projects.

Ratings:
5 - Would do it exactly the same way again
4 - Very good choice - maybe some slight room for improvement
3 - Good choice - some areas for improvement, but overall satisfied
2 - Not so good choice - should have done it differently
1 - Bad choice - what was I thinking?

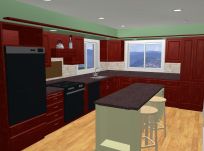
Using design software: I am going to rate this a 5 (must do). The $100 and the time to learn how to use it were very well spent. Here are examples of the model vs the actual...


Having this was critical to seeing if our plan was going to look the way we wanted it to. Sketches are one thing, but a model that you can drive around and look at is a big advantage.
Downsides: It takes a bit of time to learn how to use it to the extent your can create a full model, and it takes a while to do the full model. This being said, it takes a lot longer to rip out your work when you and your DW had a different idea of it was going to look like.

Saturday, September 08, 2007

The Kitchen is 99.9% Done

We did the final touch-up on the cabinet trim: filling, sanding, touch-up staining & re-sealing My DW unpacked her display china and put it up on the soffit shelf. Here are a couple of pictures...


Its a bit of extra work to "ease" all the mitered corners, but I really like the effect. I makes the cabinets look like they have been in place for a long time. Also, if any corners do get hit, the chance of damage is lower.

A note on the soffit: We are happy that we left it in, and modified it to match the new layout. In our last kitchen, we had the standard cabinets and displayed stuff on top of them. I think the area was too deep, so it collected a lot of dust, and didn't really show anything off. Adding the shelf created the country look we wanted.

...The only things left to do are installing the kick-plate drawers and cutting boards this weekend. There is still some trim work to be done on walls - crown and shoe moldings - but I am waiting to do it with the dining and living rooms after we paint (it never ends!)

Saturday, August 25, 2007

Details, details...

We finished up the hutch yesterday - every last detail, including accent lighting, which was a last minute decision. I considered adding lighting inside the cabinets, but thought better of it. I want the hutch to be well lit, but not stand out too much.


These are the same 4 inch can lights we put around the fireplace - they sit about 4 inches out from the top of the hutch. The end up costing about $25 each with the can and trim included. I wired them into the same circuit as the dining room light, so that the hutch will be highlighted when the lights are on. I am not a fan of a lot of switches - too complicated. I want some level of control, but not a bank of 4 to 5 switches for a single room.

I also glued on the fruit carvings we purchased a while ago, using poly glue (not too much!) The stain really brought the showdow lines of the carving out.


Here is a link to the post about purchasing the carvings from Outwater. I needed to cut the ends off, carve and sand them to shape, since they are designed to be attached in a longer chain with dowels.

Saturday, August 11, 2007

Chocolate

Chocolate is a "hobby" of my DW. She wanted to create a small display area for cooking stuff, so I built (and she painted) the black shelf that is holding the chololate mold and cookie cutters. She changes the cutters for each season.


This is a closer picture of the Dutch chololate candy mold on the shelf. I bought this on a trip to Holland a couple of years ago.


Here is a close-up of the mold set, showing the best elements of Nederlands life: a Dutch boy and girl, boating on a canal, a windmill, tulips and the Queen's symbol.

We bought the French signs at Target (so much for authenticity...)

Finally, if you want to buy the best chocolate in the world (my opinion), follow this link (sorry, the site is only in Dutch, but you can give them your info to get a brochure).

Friday, August 10, 2007

Added a Ceiling Beam

I installed the wooden ceiling beam this evening. No distasters, in fact, the whole thing took about an hour and a half, and turned out well.

The goal of putting the beam in was to create a simple visual boundary between the kitchen and the dining area, and break up the ceiling. It also makes the kitchen feel a bit more rustic.


How to installed beam:
  • Mark the ceiling and drill holes for the lag bolts (7 inch long) - I used six to hold the beam. These go into the 2x4 truss above ceiling
  • Cut the beam 1/4 inch longer than the space it needs to go into
  • Cut a hole in one wall the size of the beam
  • Lift the beam, slide it into the hole, bring it up into place, and slide it solid against the other wall.
  • Use upright 2x4's on each end (with some small peices of wood for protection) of the beam to hold it into place.
  • Lag bolt the beam from above
  • Drill and lag bolt the end of the beam that is not in the hole (picture below)

The bolt will be covered by the crown molding.

The other end sits in hole and "floats". This allows for the beam to expand and contract without pulling away from the wall and leaving a gap. Since I bought "green" douglas fir, I expect a slight shrinkage.

The cost of the 10ft beam and lag bolts $20.

Saturday, August 04, 2007

Details...

I am down to the final details of the kitchen. I spent most of the day milling, sanding and staining cherry moldings.

I also bought the 4x6 beam to mount in the kitchen (details a couple of post ago). I got it cleaned up with an portable planer, sanded and stained. As a side note, I am really impressed with Ryobi tools - good price, reliable under DIY use, and they sell pretty much everything you need.


Remaining things to do:
  • Trim out the edges of the cabinets (need to make the trim)
  • Give all the cabinets touch-up staining and a final coat of sealers - my DW does a better job at this than I do.
  • Finish the kick-plate drawers
  • Complete some hardware, hang a few doors and drawer fronts
  • Brocade the ceiling where patched
  • Hang the beam
  • Put of crown molding
  • Put shoe molding (maple to match the floor) around everything

Once this is done (hopefully all in August), I start on the remodel of my daughters bedroom - adding a walk-in closet. I will track this on my full-house blog: Greengate Ranch Remodel


Greengate Ranch Remodel Blog

Sunday, July 29, 2007

Building and Installing the Soffit Shelf

I fabricated the shelf that goes around the kitchen soffit. I glued and air-nailed 1/8 cherry plywood to a center core of 1/2 maple plywood. I left the center set back as shown to allow of it to mount to the strips I attached to the soffit.


Here are a couple of pictures of the strips. These are poly glued and air-nailed with 1.5 inch nails. I used a little marking fixture to mark the bottom of the strips all the way around before trying to mount them.


When I mounted the shelves on the strips (tapped it in place with a mallet), I had the unexpected result of having them stay up on their own. Once I put the 45 degree corner peice in place, it became very solid.

I had to basically build the corner piece in place, buy marking, cutting, then hand planing the pieces to fit. If everything were perfect, the piece would have 22.5 degree sides. In this case, they ended up being 21 on one site and 24.5 on the other. It takes a little while to get a good fit, but having tight joints is worth it.

Here are the shelves installed - I still need to put the front trim strip on, which will be dadoed to help provide good support, and allow me to blind nail it.

I have some cast iron 90 degree brackes I will put on top the shelves to reinforce them, and add some decoration.

Here is a picture of the kitchen - getting close to complete.


Saturday, July 28, 2007

Adding a Ceiling Beam to the Kitchen Plan

I have decided to add a ceiling beam across the front of the kitchen. Here is the 3D model showing how it will look.

If our ceiling height was 9 feet instead of 8, I would do a more extensive layout. Things being what they are, I am going with a single beam.

Reasons for doing it:
  • It helps define the "boundary" of the kitchen. I think having this definition improves the overall design, without closing anything in. I also ties the soffit in
  • It adds a bit of a rustic feeling, which is what we are looking for: rustic feeling, high quailty workmanship.
  • Its not expensive to do. I will fabricate a hollow beam out of #1 pine and mount it to a ledger piece screwed through the ceiling to the truss. I estimate $40 or less.

Monday, July 23, 2007

Toys in the Attic

Actually, we have no toys in our attic - only a bunch of cellulose insulation and lights that are in the wrong places. I spent all Saturday moving lights, installing new ones and patching the holes - yuck. Our house is a ranch style with a 4-12 pitch roof, so in some cases I had less than a foot and a half of head-room to work. Lucky I am only 5' 8", or I may still be stuck up there.

Technically, this is not in the "kitchen", but it's close - the built-in hutch backs up to it. Since I needed to move the dining room light (they did not center it in the middle of the room - go figure), I decided to get all the attic work done in one shot.

Now that I'm done complaining... the lights turned out well. Here is a picture of the accent lights I installed around the fireplace.


The lights shine down the stone and highlight it, which really improves the way it looks. There is one on the end (shown) that you see when you first come into the house, and there are two over the mantle to draw attention to the pictures set there.

These are 4" recessed cans with standard trim, which run about $25 each.

One of the nice features of the house is that the fireplace is in the center (click here for the details from when we rebuilt it). Frank Lloyd Wright referred to the fireplace as the "heart of the home", and often insisted that it be the main focal point of the house.

  • From an article on Wright's design: The fireplace hearth is the center of the house as Wright felt the hearth was the heart of the home and, indirectly, the family. This is not only the center of the home but of the family.

Here is a fairly good article on lighting, that may give you a few ideas.

Sunday, July 15, 2007

Traveling...

All in all, traveling for work stinks. Lots of time in airports, on planes, on trains... none of which are really very fun if you do it regularly. Also, being away from my DW and kids is a bummer.

The one good thing about it all, especially being in Europe a lot of the time, is being able to find stuff to bring home you are not going to likely find at Pottery Barn or Crate & Barrel.

I found this container for my DW in a small Belgian / French kitchen shop for about $15.


I took the picture with my cell phone, so the quality is a bit low.

Here is a picture of the shop (click picture for the web site). They were really nice people. If you are ever in western Europe, make a trip to Brugge, where the store is at - you won't be disappointed. They told me they don't have an online store, because their stock changes regularly.


If you are in western Belguim and need a place to stay, I suggest taking a look at the link below. This bead and breakfast is owned by the same people: http://www.arkvanzarren.be/arkvanzarren_english/the%20rooms.htm

Monday, July 09, 2007

TV in Kitchen Complete

I completed the installation of the TV above the range hood. Here is a picture of the opening before installing the panel.


Below is the panel installed with power, coaxial, and the TV mount. It's removable (held in place by 3 screws), so we can get to the top of the vent hood. The top trim piece is attached to the soffit - the weight of the TV and mount bascially hold the panel against it.


Building the panel was pretty simple. I glued the beadboard to a piece of 1/2 maple plywood. I also glued and screwed some 1 x 3 vertical support strips to that - so it will won't warp under the weight of the TV & mount.

Here is the TV on, of course being tuned to Food Network...

Here is the TV extended on the artulating arm, which allows it to be viewed from the dining room table (however, watching TV while eating dinner ain't gonna happen).