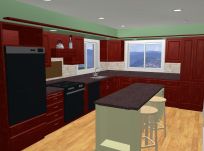
I am going to rate adding pullout shelves a must-have as a feature, but good-choice for my design.
There is no way we would go back to regular shelves. It is amazing how much more convenient these are than regular ones, especially the lower ones. No more getting on my hands and knees to get the container for left-overs out. I notice we are all much more motivated to put the dishes way with these in place.
Review of the design:
- Using laminated pine boards - really good. Once stained they have a nice warm color that goes well with the kitchen colors
- Using butt-joint construction with poly glue and deck screws - great. I could have dadoed these, or even applied dovetails, but I don't think it would have added any needed strength. I did a test piece with just the poly glue on a clamped butt-joint. Once dry, when I broke it apart, it took wood with it, keeping the glue intact. Adding 2" deck screws to this, ensured it was going nowhere.
- 3/8 pre-finshed plywood bottoms - great. The poly glues to the pre-finshed surface well, again taking wood away when break-tested. I glued the these into bottom rabbet joints, and used 1" crown staples to hold them in place (spaced about every 6 inches).
- Full extension drawer slides - must have; no brainer.
- Shelf width - I would have done this differently. I mounted the drawer slides the inside of the face frames and made the shelf widths to match (1 inch less then the opening). With 1/2 offset hinges on the cabinets doors, the shelves hit the doors and wouldn't slide out. I needed to adjust the hinges to the max outward position, giving a 5/8 offset - now the pave between the sets of double doors had a 1/2 gap. I decided rather than rebuild the drawers to be 1/2 less in width, I would put back strips between the doors. With a more rustic style, this looks fine - but if we had a modern style, it would be ugly. The fix was pretty minor over all. Lessoned learned: make sure you compensate for the shelf sliding past the drawer. the best case would have been to go with 5/8 offset hinges, and build the doors accordingly.
My favorite feature assocated with this is the pull-out toaster. In place for months now, and not a crumb to clean up in the morning. Note: for safety, I put a 20-gage piece of sheet metal on the bottom of the shelf above as a heat shield. It might be overkill, but $2 and 10 minutes work is worth it for the precaution.


1 comment:
Where is the toaster in the kitchen? We currently have our fancy toaster where it can be reached from the breakfast table, and I really like that. We are thinking about how to do that again if we ever get to the point of building a house. I like your idea.
Post a Comment