My New Blog: TF Workshop

Friday, November 17, 2006

A plug for "Tile for Less"

I purchased the granite shown on my previous post from Tile for Less in Beaverton, Oregon.

I can't say enough good things about these guys. Their prices are reasonable, selection is good and service is great. They are willing to take time with you to discuss your project and help you think about various options. I wanted to switch some tile to a different color for accent - no problem (I can't imagine doing that at HD).

I dont know if the other stores (there are a number of them in the west) have this same level of service, but my guess is that they are worth looking into.

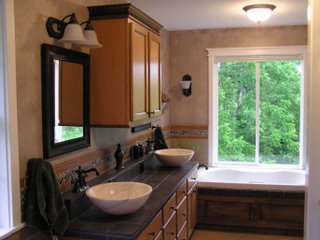
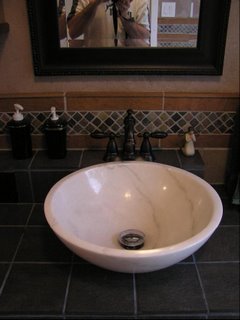
Here are some pictures of our bath we remodeled last year - we put 200 sq ft of porcelain tile in there.


Thursday, November 16, 2006

It's almost D-day

D is for demolition!

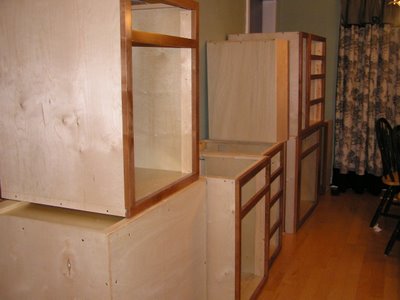
I have almost all the wall cabinets stacked up in the dining room, waiting to go in. I need to complete the pantry and double-oven cabinet.


I am taking next week off to try to get the old kitchen out and the main parts of the new one in. The plan is to finish all the cabinet details on Saturday, spend Sunday planning and running to HD for bits, and start full blast on Monday.

I am anticipating about 6 full days of work to get the old one out and the basic parts of the new one in, including windows and granite.

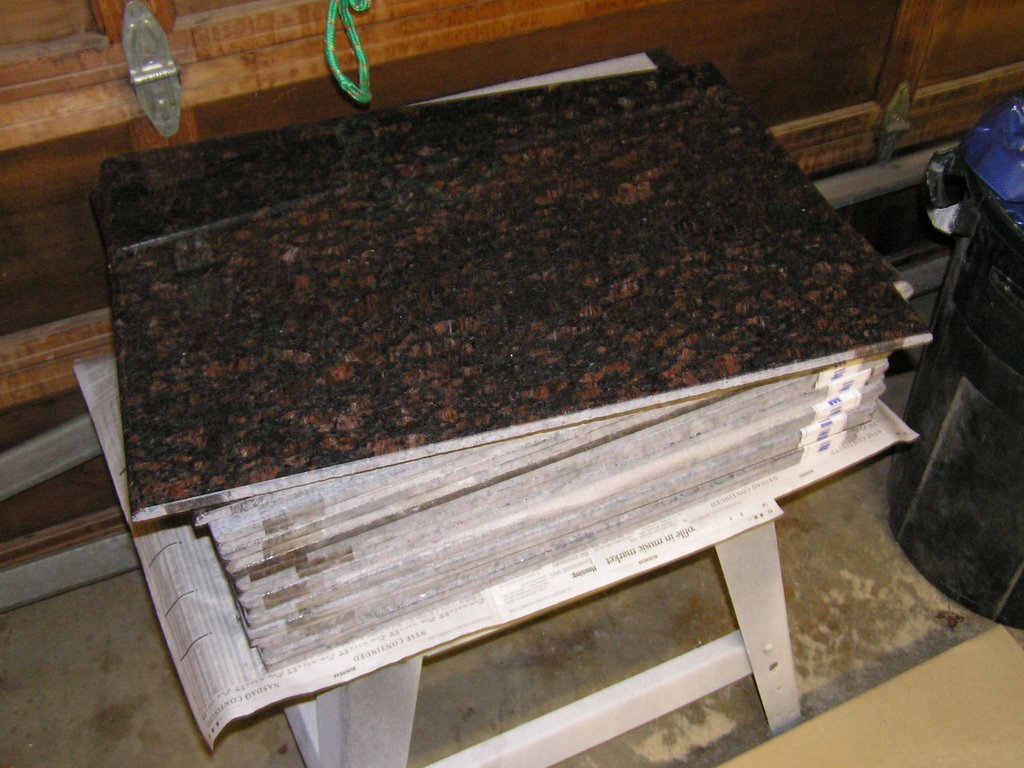
Here are the granite "tiles" I am using - its tan-brown:


These are large 18 wide by 26.5 deep, with 1/4 rounded front and back edges. They are made for counter installs, giving a minimum number of joints. I like these as a much cheaper option than slab granite, but with a lot less joints than 12x12 tiles. If I went with 12x12 with either a pre-fabricated front edge, or had the tiles edged, it still would come in at around $20 a sq ft. I am also planning to use epoxy grout, with is totally water and stain proof, and keep the joints to 1/8 inch.

I needed to buy 20 of them for a total of about 66 sq feet. The cost was $20 a square foot, which I think is a really reasonable total of $1325. I need to get a few edges rounded and polished by a local fabricator - he charges $14 a foot. I will put the total for the tile cost in the running cost update once get the fabrication done.

My only challenge is to figure out how to cut these. I have a mid-sized water saw for tile, which ought to work fine once I set up some sort of support for the 26 inch width.

Sunday, November 12, 2006

New cool tool

I just got a new tool - a craftsman professional series close quarters drill. It is definately going to become one of my favorties. I bought it for tight spaces, and I was surprised by the ergonomic improvement over regular drills. I really like being able to get my hand closer to where I am driving screws.

I bought a corded version on purpose: having a large battery hanging off the bottom can somewhat defeat the "close quarters" feature. This will be great for mounting cabinets and drilling holes for wiring.

The downside is the price being at $140. It was a birthday present...

Here is a product review link from Fine woodworking

Saturday, November 11, 2006

Change of Plan - Bumping out the new windows

We were doing the final measurements for the two new windows, and my DW decided she would really like a garden window on the south wall.

The "off the shelf" garden windows at HD are $500, but they are only 3 feet high, which will not look very good. We were planning on 42 inches, not 36. HD can get me a special order one for a little over $800. The best online price with shipping is over $1,000. A good quality regular window in a custom size (48W x 42H) is about $175. So here is what we are going to do...

After an hour of dreaming and scheming, we decided to do bumped-out windows on both the south and west sides. This will improve the exteror of the house, plus it will allow my DW to have all the window gardening space she would ever want. One spot will be heavy sun (well, at least heavy for western Oregon), and the other with sun only 1/2 the day.

I still need to do the final design of these, but here is what I have so far:
  • Bump out the wall by 6 inches (2x6 + plywood), giving about a 10 inch sill
  • Go with 48W x 42H for both windows
  • Add wire shelves 1/2 way up
  • Build out the exterior so it adds to the appearance to the house - see below
So rather than a about $1100 for one garden and one regular window with trim:
  • 2 regular windows - $350
  • Framing lumber - $150
  • Siding - $100
  • Flashing, roofing, insulation, trim etc. - $200
Total estimate of $800


I did some searching on the web for exterior bump-out ideas...

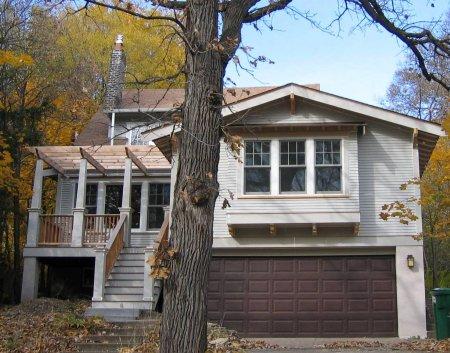
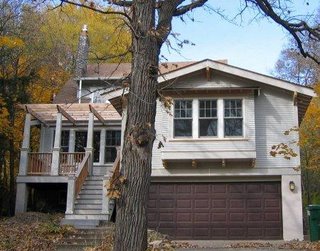
This one adds to the architecural quality of the house - it has structure and an appropriate amount of mass. I think it makes a nice focal point for the front.

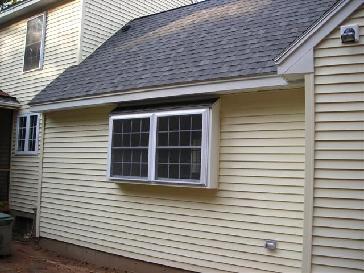
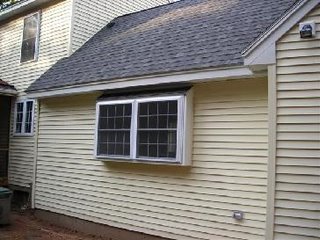
I think this one is horrifying - sorry if it's yours! It has only one purpose, deepen the sill. I am sure from inside it looks great, and this is likey on a hidden section of the house. Some mass around it would add a lot. This is also why I don't like exterior look of garden windows.

We have decided to not do a whole lot on the exterior of the house until the inside is done, but this will be an exception.

Thursday, November 09, 2006

Deadlines...

I put myself on a schedule for this kitchen remodel, hoping to have it done by Thanksgiving - and have people over. It is not likely going to happen. Vacations, kids, work, sickness, and life got in the way a little bit. I also volunteered to make two coffins (yup, coffins) for a haunted house out of OSB.

I haven't lost all hope yet (I'm a perennial optimist). I should have all the wall cabinets done on time, and I am taking the full week of Thanksgiving off to get a whole lot done. I have started stacking completed cabinets along a wall in the kitchen, so the anticipation is growing.


A bit of detail on the cabinet design: I have 1x3 (actually 3/4 x 2 1/2) strips running down the side-walls. These will allow the drawer and shelf slides to be flush with the face frame edges. An added benefit is that the cabinets are now ultra-stout, and will easily support the granite tops.

Kohler Vinnata Kitchen Faucet

We decided on a Kohler Vinnata facet in brushed nickel. This is one of the "high end" items that we decided to fit into the budget. It has a classic look with the pull-out feature.

It cost $350 plus $30 shipping from the ebay store "The Plumber's Crack". I am not very impressed with the seller's store name, but the price and service were great. It arrived 2 days after we paid for it. Other online stores sold it for $400 to $500. It retails for about $540.

Tuesday, October 17, 2006

Base Cabinets

I completed the basic boxes for base cabinets - the assembly went pretty much as planned.

The 1/2 pre-finished plywood works great here. Working with polyurathane glue is a bit harder than wood glue, since there is no "tack" to it, and it takes a few hours to dry. I re-enforced all the joints with 3/4" x 3/4" wood strips on the blind sides, which will act as supports for shims on the tops of cabinets and nailers for the trim on the bottoms.

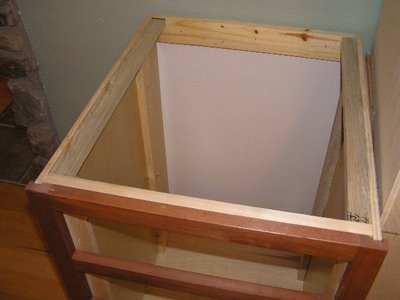
Here is the front part of the upper corner cabinet:

I designed this cabinet to be only 10 inches deep on the sides instead of the standard 12. This changes the backs from 27 to 24.5 inches, allowing a full 48 inch wide window with trim. It also makes the back corner under the cabinet more visible.

This cabinet will hold a couple of "D" shaped lazy suzans that use almost the entire footprint.

Wednesday, October 11, 2006

Green Remodeling

Whenever possible, I try to incorporate Green actions into my remodeling.

Being from Oregon, we don't often associate politics with being environmental (discounting the extremists, etc.), we just think it's a good idea. I hope both political liberals and conservatives will practice "recycle, reuse, reduce". Many actions we can take are the simple or small ones, that ultimately add up.

Green elements of this kitchen remodel:


  • Reusing the cabinets doors - the boxes are terrible, but the doors are in great shape. If we did not reuse them, we would donate them to the Rebuilding Center (see below)
  • Adding 1 inch rigid foam insulation behind all cabinets - increases the R-value by 4.5, and adds one inch depth to the counter tops
  • Replacing the old aluminum windows with energy star (Lo-E) ones
  • We are keeping the soffits - insulating all of these
  • Adding 12 inches of cellulose insulation to the attic, once the lighting is complete
  • All the plywood I have bought is from Shur-way (see resources on the side bar). Beyond having really good prices and being very nice people, the materials are over-runs, slightly damaged, etc. If we buy these kinds of materials, they don't get land-filled.
  • Install Energy Star appliances where we can
  • And the biggest of all - we are recycling (remodeling) an older house

Once the kitchen is done, I have been considering adding solar to the house (it already has a passive design) to start that electric meter running backwards...

Resources:

Tuesday, October 10, 2006

Range Hood Module

Since I am building the range hood to match the cabinets, all we need to buy is the fan unit. I selected a Broan Power Module PM250, from NutoneSales.com (Nutone is a brand of Broan) for $90 + 12 for shipping.

The next best price I could find online was $130, and in-store for about $150.

It is a basic unit with 250 CFM, aluminum filters and a light. I read a TOH article on hoods, and they indicated that 250 should be fine for most applications, and if you get above 350 CFM, you can get other back-draft issues.

You can buy a mounting kit, but I decided to pass on it. The hood cabinet is custom anyway, so cutting the hole in the bottom to fit should not be a problem.

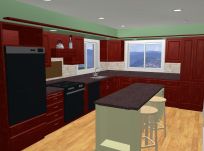
Here is a rendered image of how the hood cabinet will look:

Cabinets...

I think I will be doing a lot of posting on building the cabinets...

I completed assembling the uppers and bases, with the exception of the corner cabinets. Everything went together pretty easily - no problems. Once we get back into town, I should be able to get the corners, pantry and double-oven cabinets done in about 6 hours.

I have decided not to put the backs on cabinets (3/8" maple ply) until I have mounted all the drawer slides, etc. This should make that part of it simpler.

Saturday, October 07, 2006

Continuing with building the cabinets

One of my favorite things to do is woodworking in my garage on a cool fall day. It becomes perfect if can listen to an Oregon State football game and also spend some time talking with my kids about the things that are important to them. Today was pretty close to one of those days.

I got most of the plywood cut for the base cabinets, and I plan on assembling them tomorrow. I should be able to get all of them complete in just a few hours. The dadoed face-frames and 3/4" cleat for assembling the boxes allows everything to go together easily.

We are flying off to Disneyland on Tuesday, so all this work stuff will to go on hold again for a week or so. I am looking forward to just relaxing and having fun with the family.


Friday, October 06, 2006

Back at it

Life is what happens when you are planning what you are going to do next: Two trips out of town for work and getting sick put a temporary stop on the kitchen. I haven't been been able to work on the cabinets for a couple of weeks.

I am looking forward to this weekend. I want to at least get the cabinet boxes complete and the kick-plate drawer assemblies done.

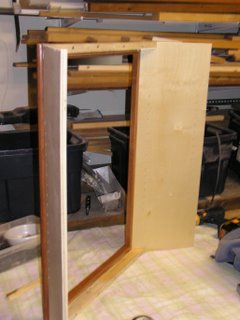
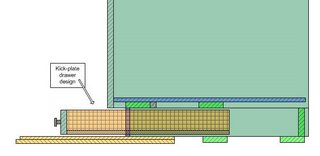
Here is the design for the kick-plate drawers. Basically, the structure will be 2x4 drawer bays with 3 inch drawers. The inset of the drawers will be only 2 inches under the cabinets - so that access will be easy. They will be almost 3 feet wide where possible, so we can store very long items.