My New Blog: TF Workshop

Monday, January 28, 2008

Review #14 - Soffit Above the Kitchen Cabinets

This is somewhat of a controversial topic: Should you tear out the soffit in an older kitchen or leave it in? We left ours in and actually added to it for the additional cabinets. We added a display shelf to it, as shown in the picture:


Are we happy with the choice? Yes. The main reason is the display shelf idea we came up with. If it were just a plain soffit, I would have rather had cabinets that went all the way to the 8 foot ceiling. Here is a picture of it before shelf - not too exciting...


We did not have the problem that many people do: The soffit holds a large amount or electrical wiring or plumbing. Ours is basically hollow, so we were not "forced" to keep it in. It would have been straight forward to tear it out and patch the ceiling, but we wanted to keep it in the design.

Here is a picture of the section I added to go over the double-oven and bookshelf cabinet...
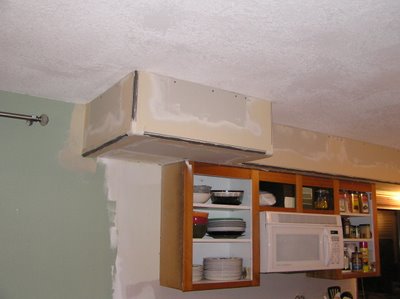


Why we like it:
- We don't think it looks dated in our kitchen with the added shelf. The shelf helps bring the edges of ceiling down, improving the feeling of scale.
- The shelf displays things much better than setting thme on top of the cabinets
- We don't have the "dust on top of the cabinets" problem

Thursday, January 17, 2008

Review #13 - Extra Deep Upper Cabinets

Our upper cabinets are an extra two inches deep (14") to allow for the normal 12" deep shelves, plus room for spice racks on the insides of the doors. While we generally like this design, there are some changes we would make if we did it again.


With the 12" shelves, we were able to put in lazy-susans, giving easy access to a lot more items. I needed to modify 14" shelves by cutting them back as shown.

This extra depth doesn't block any view of the back of the counter top or backsplash.


If I had it to do over again, I would have made the cabinets 15" to 16" deep. I could have put larger racks on the doors, giving a more space. I don't think this would be too deep to allow us to see to the back of the counter top.

Also, for the spice cabinet, my DW says she would have preferred a couple of pull-out spice racks, instead of the door racks and lazy-susans. At some point, I may go ahead and build these.


Saturday, January 12, 2008

Review #12 - Appliance Lift

We would rate the appliance lift as a "nice to have" item. This model is made by Rev-a-Shelf, and was purchased through Rockler for $100.

It has really been convenient for my DW, who cooks from scratch most of the time. She lifts it up, uses it, and drops it down. The pull-out shelf below holds the mixer and food processor attachments.

The shelf is 18 inches wide (cabinet opening is 22"), so it holds two applicances - a Kitchenaid mixer and food processor. It's not too heavy for my DW to lift up and down. Note that it is also covered with 1/2" granite to match the counter.

If you install one of these, make sure to put an outlet in the back of the cabinet - it's well worth the effort. The cords lay behind the shelf as you raise it, and simply stay out of the way.


Here is a shot of the lift in the cabinet.

I would have made the cabinet shallower if I had to do it over again. I wanted to keep the cabinet to a minimum depth so the back side of it could be used effectively. The instructions indicated you need 23", so that's what I made it to. In reality, I could have gotten away with 18" deep and saved 5 inches. This would have allowed us to put another stool on the backside, instead we put a bottle rack. This is not a terrible result though, since we like the bottle rack. There is also room above the applicances for a cutting board slot, but we haven't put that in yet.

In review, it was worth the cost and effort to install it.

Sunday, January 06, 2008

Review #11 - Fluorescent Under-Cabinet Lights

We absolutely love the under-cabinet lights. They really improve the feel of the kitchen, and make working much more comfortable. Here are pictures of the effect of the lighting...


We chose to go with fluorescent because they are the most economical to install, take the least amount of electricity (the green option), and they puts off low amounts of heat. The halogen lights we looked at put off too much heat, and Xenon puck lights were not appealing (and cost more).

The average cost per fixture was about $25.

The arguments against fluorescent are the light is cold, and the fixtures hum - neither is true in our case. The GE Premium UCF Fixtures don't flicker when turning on or hum.

The light actually has a warm feeling, but we have warm colors with the travertine back splash and granite counter tops. This may be very different with other materials.

We would do this the same way again. Possibly in a few years when LED's are more mature, we will try them, since they are by far the most efficient lights made.

Wednesday, January 02, 2008

Review #10 - Granite Tile Counter Top

Our granite has been installed for about a year now, and we still really like it. I would do this again the same way, and we consider it a "must do" for the kitchen.

I installed it with polyurethane glue (Elmers) on a base of 3/4" birch / maple plywood, that had additional 3/4" pine support struts underneath. Once in place we use epoxy grout to seal the very thin (1/16" or less) joints. Everything has held solid - no cracking, shifting, etc. The grout has no stains and looks as good when installed (my DW cooks everyday).

While not being full slab, the tiles are large enough to only require a few joints. The island top shown is 90" long. I believe it's a good trade-off for doing granite at $25 per square foot. That being said, I don't think this is a project for a novice or new DIY'er. If you have a fair amount of experience with tile or masonry, it's not too bad.

Saturday, December 01, 2007

Review #9 - Pull-out Garbage Can

We love the pullout garbage can - this is a "must do". Also the pullout rack shown below is really nice. That being said, I would have done very this differently. It was a hassle to install.


The main problem was the garbage can was a few inches too tall. I looked at a number of products, and this was the shortest one I could find, (maybe I should design and market one that would fit better...)

To get this to work:

I needed to move the garbage disposal to the lower sink, so I would have the max vertical distance under the higher one. Having the disposal in the larger sink actually works really well, so no problem there.

Then I had to create a low-profile drain pipe connection (took three tries), and route it to the back of the cabinet. This gave me space for the garbage can.


After getting the space squared away, the garbage can was still an inch too tall. I took the slide assembly apart, re-drilled some holes, ground down the brackets and took a half an inch out of the height. Half an inch to go...

To get the final bit I needed, I cut the back of the garbage can out so it would slide by the drain pipe. I cut just enough out, using an angle grinder, so the top of the can wouldn't become flimsy.

So after getting my Ph.D. in pullout garbage cans, here is what I would do different: Simply, I would have designed the cabinet so that it would have gone all the way to the floor, and not had a kick-plate area. That would have given me an extra four inches, and it would have been much easier. To make the cabinet look good, you could mount a fake kick-plate the the back of the cabinet door.

One really nice feature that I didn't plan for, is the dishwasher, sink and garbage layout. We can have the dishwasher open, the garbage can out, and the sink with the disposal in the center. This is about the most efficient setup I can think of.

Sunday, November 25, 2007

Review #8 - Work Triangle / Island Layout

I am going to rate the overall layout and work-flow of our kitchen as a 4 (good choice, slight room for improvement). I did a review of it once it was in, but we have now lived with it for an additional 7 months. Here is the layout...


We now think the location of the fridge is great - not just good, even though it fall outside of what is considered an optimum work-triangle. Here is why:
  • The kids can get to it without interfering with people cooking
  • We easily set stuff on the island
  • You can sit at the island, watch TV and grab the milk without moving!
The space between te island and the fridge wall is OK. 36" has not been a problem at all. We can still sit at the island and have someone move behind us. Would 6 inches be better? Yes - but it's not a killer

42 inches between the island and the counter is great. I would not change this, even if I had the room to do so. The max I would want is 48 - any wider and it would not be easy to reach from one side to the other.

Island at 30" x 90" is great. It could be 36" wide, but no wider - too hard to reach across. The kids are able to sit and do homework at the island while my DW is working with no problems. Anything longer than 90" would make the trip around the island too long.

So if I design a new kitchen, it will be 12" wide - 24" for the counter, 42" isle, 36" island, 42" isle.

The pot rack over the island works really well. It provides a lot of storage, does not block cross-views, and looks nice.


More how-to detail in my article library on eHow...

Tuesday, November 13, 2007

Review #7 - Kick-plate Drawers

The kickplate drawers are great - now that they are in. I will rate these a 3 - I like the resutlts, but I could have done these differently.


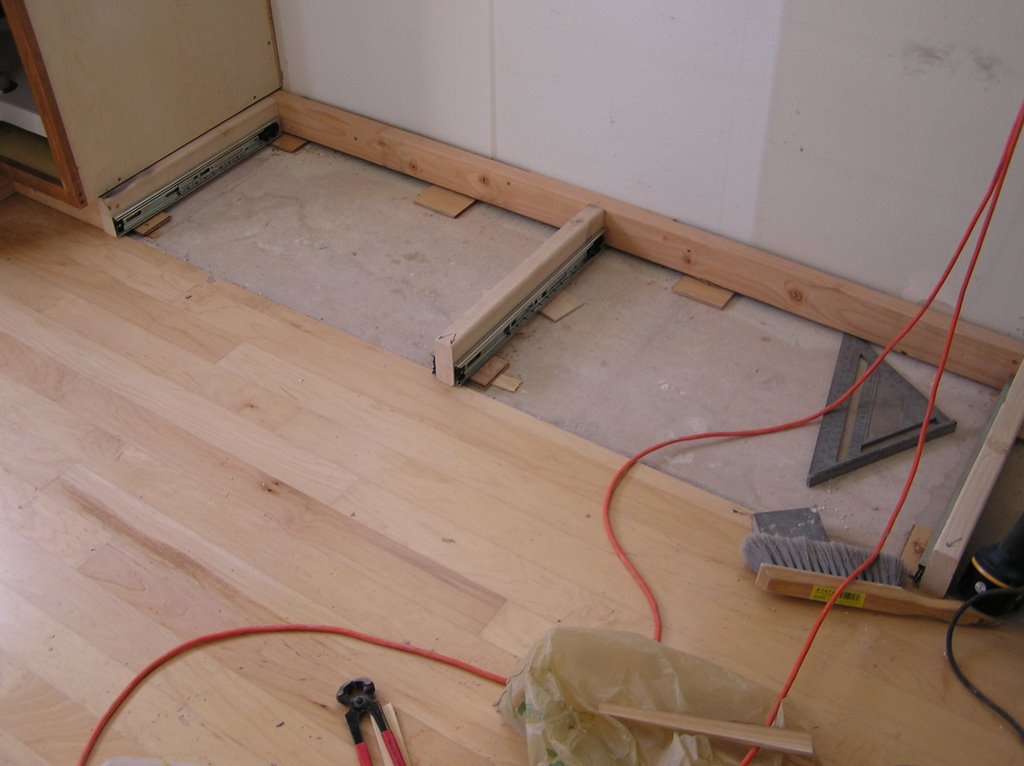
I made the bases out of 2x4s, and screwed the drawer slides to the sides. Once these bases were in place, I screwed the cabinets to them.


So what didn't work so well? The 2x4's ended up having either a slight twist or warp to them. When I attached the drawer slides to them, they were a obviously off as well and needed to be adjusted. There is not a lot of room under there to do the adjusting, so it was a bit frustrating. I ended up shimming them to get them aligned well enough for smooth operation. Lucky I didn't build the drawers until after I did this, or they would have been slightly too wide.

What would I have done diffferent? I would have glued and screwed 2 pieces of 3/4 plywood together instead of 2x4's. This would have made a much straighter, stable frame for the slides - no shimming required.

One final positive note, making these drawers extra wide (34 inches) was a good idea. My DW can easily large flat stuff.

Monday, November 12, 2007

Review #6 - TV in the Kitchen

I wanted to rate the TV in the kitchen as a "must do", but my DW and daughter insisted I rate it "nice to have" but not required. This was an addition to the kitchen late in the remodel project.

Here is a picture of with all the final cabinet work done.


Positives:
  • It's nice to have the TV available when my DW is cooking in the kitchen (she loves cooking and football).
  • We only have one other TV in the house, and this is a good location for the second one.
  • It's great to be able to sit at the bar or kitchen table while watching TV.

Negatives:
  • Maybe we now watch a little bit to much TV...

The installation of the TV was straightforward. Probably the toughest part was running the cable around the house - and there was nothing difficult beyond moving the extension ladder a lot.

The key to a simple install was the panel. Pre-mounting the TV bracket and pre-wiring it for power and cable, made it all go in easily.


One thing I think you must have is a good vent hood. Ours is 250 CFM, and it pulls everything out before it gets up to the TV. Also, the TV sits just a bit back from the hood mantle, so any rising smoke or steam goes past it.

Sunday, November 04, 2007

Review #5 - Pegasus Granite Sink

I will rate the ganite sink a 5 - must do and would do the same again. We have had the sink in place for almost a year - it still looks and functions like new.


Sink Quality:

  • Black granite finish still looks great
  • Easy to clean
  • No problems, leaks, etc.
  • At $280, we were happy with the price.

Installation:

  • The ledger and poly glue method worked great, creating a fully supported and water-proof seal. What if need to take it out some day? I'll worry about that later. Even if I used clips alone, I would not be able to get the thing out of the cabinet. If it ever comes out, it comes out with a hammer.
  • I left a generous reveal around the sink to help keep water off the counter, and give a back-space to put the strainer, etc. I like this set-up - I think it keeps the counter cleaner, and looks fine.
  • I did a final seal of the sink to the granite counter with epoxy grout. Works great.

Summary:

  • The black sink looks good with the tan-brown granite and cherry cabinets. I think it is a classic look that won't become dated in the coming years.

Possible Improvements:

  • I think this is a good product, but the information available on it is pretty poor. I know it's made by Blanco for Home Depot, so I did some research on that before deciding to use it. I think HD could do a better job with their online promotion of specialty products.

[Link to all sink entries]

Saturday, November 03, 2007

Review #4 - Adding Beadboard to the Cabinets

For our kitchen style, this was a "must have", no question. On the cherry cabinets, we added cherry beadboard plywood. The island and hutch have the traditional beadboard strips applied.

Since posting on this, I have received a number of inquiries on how to apply the beadboard to the sides of the cabinet, so I will give some additional detail here.

First off, is it worth the price?
  • I would say yes. It's a relatively cheap upgrade that significantly changes the look of the cabinets. The plywood cost about 70 cents per square foot, and the pine strips 1.20. Considering we found the plywood at a discount lumber place and got a really good price, you could use 1.50 per sq ft to estimate the material cost. Note that we are in Oregon, and it may vary regionally.

What level of skill does it take?

  • From an experience standpoint, I would not suggest someone do this as a first project. Its not that difficult, its just that you should learn on something a bit less visible. My dad always said (and now I say - go figure), "start in a closet". If you have never cut trim or used a saw, I would start on a smaller project to gain some skills. Possibly, putting beadboard on an end table or a kid's dresser.

  • This may sound a bit silly, but you will need to know how to hammer a nail without bending it over. Bent nails will damage the beadboard and tick you off. Two things: hold the hammer at the end (don't choke up on it), and nail small nails with your wrist.

  • You can do either strips or a sheet of plywood or MDF.
How to install?

  • I am not going to do full write up on this, when This Old House provides a really good article on how to get this done. On the page where Tom shows you to start at the corner, start that the front of the cabinet.
  • Here is the detail I will give: The face-frame of cabinets typically have a 1/4" to 3/8" overlap from the side to allow you to apply end panels or beadboard. The diagram below shows how I did it (click to enlarge)
  • One more tip: use glue and keep the nails to a minimum. If you have access to an air-nailer, 18-gage nails will make the job pretty easy. You can hand nail, but it will take a bit more time. I suggest using poly glue (Gorilla Glue, Elmers Nano Glue, etc.), since the sides of your cabinets will likely have either a melamine surface or a sealant. Wood glue will not work well on anything but a raw wood surface.

Pictures


Additional reference

Friday, October 26, 2007

Review #3 - Epoxy Grout - Must Have

I am rating epoxy grout a 5 (must have) for the kitchen. We have had it in the counter-top joints for over six months, with absoultely no staining or other problems. It looks the same as the first day it was installed.


We used it both on the granite counter and in the backsplash.
Here are my "cons" about epoxy grout.
  • Expensive. We probably spent a total of $75 to do everything. But you don't have to spend money on sealers, cleaners, etc. Also, all your hard work stays looking good.

  • A bit hard to work with. If you have never grouted before, this is not the place to start. It hardens pretty fast, and can't be cut with water to give you more time. That being said, its not that much more difficult to get it into the joints.

  • Not sold in many places. Lowes carries SpectraLock.


Things you should remember if you use it:

  • Use a drop cloth - it sticks to everything. Also, mask off areas you want to protect.

  • Work the grout in with a rubber float. A stick, sponge or rag doesn't seem to work very well.

  • Have a helper who can do the cleaning while you are continuing to grout

  • You can a mix it a little "wet" (less sand) as described in the instructions, I suggest you do it. It extends the open time.

  • You can mix sand colors to get exactly what you want. The sand is the cheap part.

  • Keep your joints small (1/8" max), or it will cost you an arm and a leg.